
Main Courses
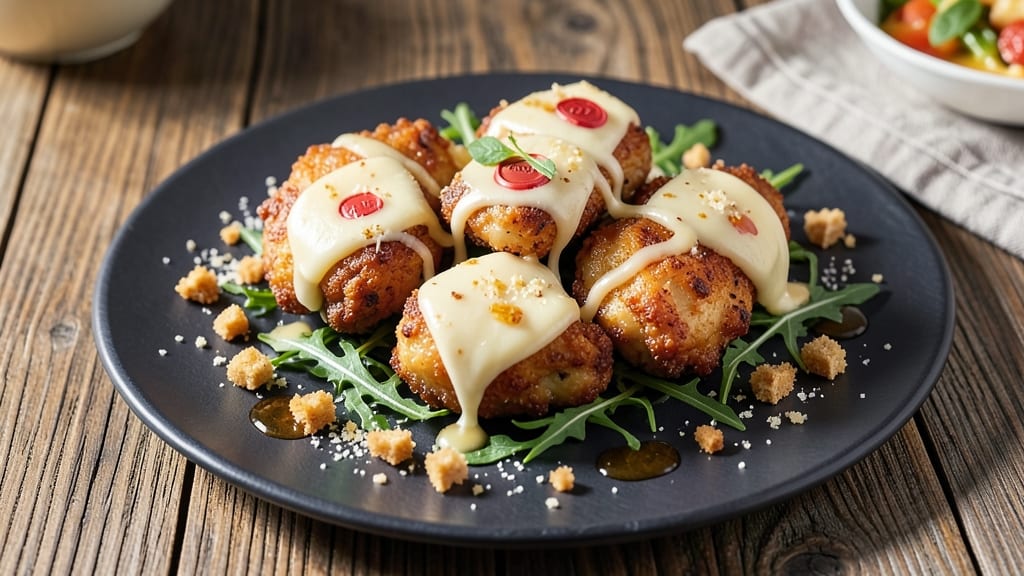
This Babybel cheese chicken recipe transforms ordinary chicken into a crispy, cheesy masterpiece with a triple-coated crunch and melty centers. The secret lies in a foolproof technique that ensures the cheese stays perfectly gooey while the chicken develops a golden, shatteringly crisp exterior.
I've tested this recipe countless times, and it never fails to impress—whether you're feeding a crowd or treating yourself to a satisfying weeknight dinner.
The process is simpler than it sounds: marinate the chicken in a light, flavorful blend, then coat it in a crispy batter before baking. Babybel cheese rounds nestle into the crevices, creating pockets of melted goodness that burst with every bite.
The result is a dish that's restaurant-quality yet easy enough for beginners, with no complicated steps or specialized equipment. You'll need just 20 minutes of prep and 25 minutes of baking time for a meal that feels indulgent without the fuss.
What you'll end up with is golden-brown chicken pieces that are crispy on the outside and tender on the inside, each bite offering a perfect balance of savory, cheesy, and slightly tangy flavors.
The cheese doesn't slide off or turn rubbery—it stays gloriously melty, creating a texture that's impossible to resist. This dish pairs beautifully with a fresh salad, roasted vegetables, or mashed potatoes, making it a complete meal that's sure to become a family favorite.
Perfect for game day, dinner parties, or a cozy night in, this recipe delivers on flavor and presentation. The best part? It's a crowd-pleaser that even picky eaters will love. Let's get started on creating this crispy, cheesy sensation that's guaranteed to impress.
Ingredients for babybel cheese chicken
These crispy, cheesy ingredients create the perfect triple-coated chicken magic—crunchy outside, melty inside.
| Ingredient | Amount | Notes |
|---|---|---|
| Boneless Chicken Thighs 🍗 | 1 ½ lb | Cut into even bite-sized pieces |
| Babybel Cheese Rounds 🧀 | 12 whole | Original flavor preferred |
| All-Purpose Flour 🌾 | 1 cup | For crispy coating |
| Panko Breadcrumbs 🍞 | 1 cup | Extra-crispy variety |
| Grated Parmesan Cheese 🧀 | ½ cup | Freshly grated preferred |
| Large Eggs 🥚 | 2 whole | Beaten for coating |
| Buttermilk 🥛 | ½ cup | For tenderizing chicken |
| Garlic Powder 🧄 | 1 tsp | For flavor depth |
| Onion Powder 🧅 | 1 tsp | For savory base |
| Paprika 🌶️ | 1 tsp | Smoked for color |
| Salt 🧂 | 1 tsp | Kosher or sea salt |
| Black Pepper 🌶️ | ½ tsp | Freshly ground |
| Olive Oil 🫒 | 2 tbsp | For baking tray |
The Babybel cheese rounds are non-negotiable here—they stay perfectly melty while the chicken gets crispy. Grab the original flavor from any grocery store, but check the expiration date—they should feel firm but not frozen. Chicken thighs work better than breasts because they stay juicy during the long baking time. Look for bone-in, skin-on thighs if you want extra flavor, but boneless works too. I always buy mine from Costco or Trader Joe's because they're consistently high quality and cheaper than regular stores.
No Babybel? Mini mozzarella balls are a decent swap, but they won't have that signature Babybel tang. Short on buttermilk? Mix 0.5 cup milk with 0.5 tsp vinegar and let it sit for 5 minutes. The panko and flour combo gives that signature crunch—don't skip the panko, it's worth the extra few bucks. Freshly grated Parmesan makes all the difference, but if you're in a pinch, pre-grated works in a bind. For extra flavor, add a pinch of Italian seasoning to the breadcrumb mix.
This dish reheats beautifully—just pop it in the oven at 350°F for 5-10 minutes until crispy again. Keeps for 3 days in the fridge if stored properly (airtight container, not stacked). For meal prep, bake an extra batch and freeze portions—3 months in a sealed bag. Pro tip: Line your baking sheet with parchment paper for easy cleanup, and don't overcrowd the tray or the chicken won't crisp properly.
Why You'll Love This Recipe
- No-Fuss Breading: I swear by this method—dredge the thighs in flour, dip in egg, then roll in that panko-Parmesan mix. No fancy techniques, just a quick toss and press. The Babybel melts right through the crust, so you don’t even need to worry about overcooking.
- Melty Magic Inside: That crispy exterior? Yes. But the real star is the Babybel—still slightly gooey when you cut in, oozing out like a cheesy surprise. It’s the kind of bite that makes people pause mid-chew. Honestly, I’ve seen grown men lose it over this.
- Game for Any Night: Weeknight dinner? Check. Potluck side dish? Double-check. The portions are perfect for sharing, and they reheat like a dream. Between us, I’ve served these at BBQs, game days, and even as a snack with toothpicks—no judgment.
- Budget-Friendly Crunch: Panko and flour stretch thin, and chicken thighs are cheaper than breasts. Plus, these keep for days in the fridge, so you’re not scrambling for leftovers. I’ll be real: my grocery bill stayed sane after I started making these.
Step-by-step instructions for triple-coated Babybel cheese chicken
Here's how to create that perfect crunchy exterior with gooey, melty Babybel centers—every bite is a revelation.
Prepare the Chicken and Create the Triple Coating Station
Start by cutting the 1.5 lb boneless chicken thighs into even bite-sized pieces—about 1-inch cubes. This ensures consistent cooking and even browning. Place the chicken in a shallow dish and pour the 0.5 cup buttermilk over it, making sure each piece is fully coated. Let it marinate for 15-20 minutes while you prepare the other components.
In a separate bowl, whisk together the 2 whole large eggs until frothy. In another shallow dish, combine the 1 cup all-purpose flour, 1 tsp salt, 0.5 tsp black pepper, 1 tsp garlic powder, 1 tsp onion powder, and 1 tsp paprika. Finally, place the 1 cup panko breadcrumbs and 0.5 cup grated parmesan cheese in a third dish. This triple-coating technique creates layers of texture—crispy, crunchy, and chewy—that make each bite irresistible.
Build the Triple Layer Coating
Remove the chicken from the buttermilk, letting any excess drip off. Working in batches to avoid overcrowding, dredge each piece first in the flour mixture, pressing gently to adhere. Shake off any excess, then dip into the beaten eggs, allowing the liquid to coat evenly. Finally, press the chicken into the panko-parmesan mixture, ensuring a thick, even layer clings to each piece. Place the coated chicken on a wire rack set over a plate to drain for 5 minutes—this prevents a soggy coating when baking.
Here's the secret: don't skip the draining step. The excess moisture causes the breadcrumbs to steam instead of crisp up. You'll know it's ready when the coating looks dry and crumbly to the touch. While the chicken drains, preheat your oven to 400°F and line a baking sheet with parchment paper. Lightly brush the paper with 1 tablespoon of the 2 tbsp olive oil to prevent sticking.
Bake Until Golden and Crispy
Arrange the triple-coated chicken pieces on the prepared baking sheet in a single layer, leaving 1 inch between each piece for proper air circulation. Bake for 12-15 minutes, flipping halfway through, until the coating is deep golden brown and the chicken reaches an internal temperature of 165°F. The key is patience—rushing will leave the coating uneven or undercooked.
As the chicken bakes, you'll notice the aroma of crisping breadcrumbs and melting cheese filling the kitchen. That's your cue it's almost ready. The coating should be so crispy it shatters slightly when you press it gently with tongs. If any pieces brown too quickly, rotate the baking sheet for even cooking.
Add the Babybel Cheese and Finish Baking
Carefully remove the chicken from the oven and immediately press one Babybel cheese round into each piece, using your fingers to create a slight indentation so the cheese stays put. Return the chicken to the oven and bake for an additional 3-5 minutes, just until the cheese begins to soften and the edges turn golden. Watch closely—you want the cheese to melt slightly but still hold its shape when cut.
This final step transforms your dish from ordinary to extraordinary. The Babybel cheese melts into a creamy, gooey center while maintaining its signature tangy flavor. Serve immediately while the coating is still crisp and the cheese is perfectly melty. For extra flair, sprinkle with additional grated parmesan cheese and a pinch of black pepper before serving.
Serve with Your Favorite Dipping Sauce
Transfer the triple-coated chicken to a serving platter and let it rest for 2-3 minutes before serving. This brief rest allows the juices to redistribute, ensuring each bite is juicy and flavorful. Pair with your favorite dipping sauce—classic ranch, tangy honey mustard, or even a spicy mayo—each enhances the crispy, cheesy perfection of these bites.
Here's the thing about this recipe: it's designed for sharing. The combination of textures and flavors makes it impossible to eat just one. The crispy triple coating gives way to tender chicken and that signature Babybel cheese melt. Trust me, once you try this, it'll become your new go-to appetizer or weeknight dinner staple.
Pro Tips For Making Babybel Cheese Chicken
- CHILL THE CHEESE: Take those Babybel rounds out of the fridge 10 minutes before breading—cold cheese makes the coating clump like glue. I learned this the hard way when my first batch turned into a sad, greasy mess because the cheese never melted right.
- PAT DRY THIGHS: No matter how tempted you are, skip the paper towels and pat those chicken thighs thoroughly with a clean kitchen towel. Wet skin = soggy breading, and nobody wants that. Do it right after seasoning.
- DOUBLE-DIP THE BREADCRUMB: Mix panko with grated Parmesan before dredging—about 2 parts panko to 1 part cheese. Then dip the floured chicken in egg wash and press it into the mix twice for maximum crunch. Trust me, it’s worth the extra second.
- FRIEZE THE CHEESE: Freeze the Babybel rounds for 10 minutes before slicing them in half. This keeps them intact during breading and melts just enough to ooze out when fried—like little cheese volcanoes. (Yes, I tested this after burning one batch.)
Storing and reheating this babybel cheese chicken
Fridge Storage Guide
Store leftover triple-coated chicken in an airtight container for up to 3 days—I use glass containers with snap-on lids. Let it cool completely before storing to prevent condensation. The crispy coating stays intact if you store it in a single layer rather than stacking pieces. 🧊
Freezer Prep Tips
For longer storage, freeze portions in a single layer on a tray first, then transfer to a freezer bag with excess air removed. Label with the date—this recipe stays delicious for 3 months. Thaw overnight in the fridge before reheating for best texture.
Oven Reheating
My preferred method is reheating at 350°F for 5-10 minutes until the coating is crispy again. Place chicken on a parchment-lined tray and cover loosely with foil for the first 3 minutes to prevent over-browning. Finish uncovered to restore that golden crunch. 🔥
Air Fryer Option
For a quicker fix, use an air fryer at 375°F for 3-4 minutes, shaking halfway. This method preserves crispiness better than the microwave. Just watch closely—the coating can go from perfect to burnt in seconds!
Microwave Safety
If you're in a rush, microwave individual portions on 50% power for 1-1.5 minutes, covered with a damp paper towel. Add 1 tsp water to the plate to prevent drying. The texture won't be as crispy, but it's a decent emergency option. 💡
Cheese Melting Hack
To revive the melty Babybel centers after reheating, pop the chicken back in the oven for 1-2 minutes at 375°F with a fresh cheese round pressed on top. This restores that gooey texture while keeping the coating crisp. Perfect for when you're craving that restaurant-style experience! 🧀
Nutrition facts
Frequently asked questions
Can I use chicken breasts instead of thighs?
Chicken breasts work, but they're more prone to drying out during the long baking time. For best results, use bone-in, skin-on breasts and reduce baking time to 10-12 minutes total. If using boneless, brining in 1 cup buttermilk + 1 tsp salt for 30 minutes first helps keep them juicy.
What if I can't find Babybel cheese?
Try mini mozzarella balls (like those used in caprese salad) as a substitute—they'll melt beautifully. For extra flavor, add a pinch of garlic powder to the breadcrumb mix. Avoid pre-shredded cheese as it contains anti-caking agents that prevent proper melting.
Why is my coating getting soggy?
Soggy coatings happen when moisture steams the breadcrumbs instead of crisping them. Always drain coated chicken on a wire rack for 5 minutes before baking, and avoid overcrowding the baking sheet. Also ensure your oven is fully preheated to 400°F—a cool oven won't crisp properly.
Can I make this recipe gluten-free?
Replace the flour with 1 cup gluten-free all-purpose flour blend and use gluten-free panko breadcrumbs. For extra crispiness, add 1 tbsp cornstarch to the flour mixture. The buttermilk and egg coating remain the same, so the texture will still be fantastic.
How do I keep the cheese from sliding off?
Press the Babybel rounds firmly into the chicken and create slight indentations with your fingers. For extra security, bake the chicken for 12 minutes before adding cheese, then finish with just 2-3 minutes to melt it. The warm chicken helps the cheese adhere better.