
Snacks
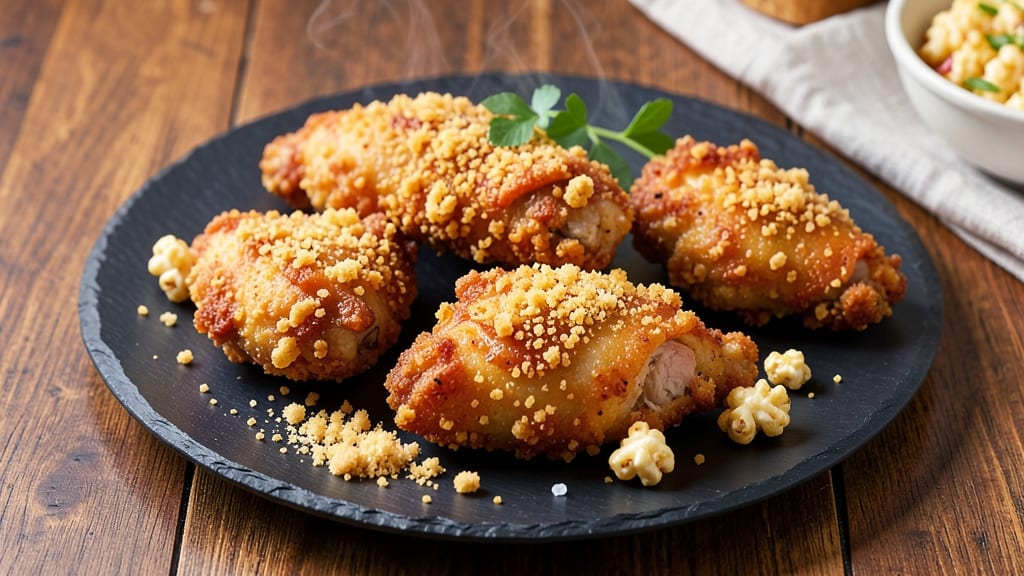
This air fried popcorn chicken recipe delivers restaurant-quality crispiness with a buttermilk brine that transforms ordinary chicken into addictive, crunchy bites. The secret lies in the air fryer's precise heat and the popcorn-style coating that creates that signature shatteringly crisp exterior while keeping the meat juicy inside.
After perfecting this technique through countless batches, I can confidently say this is the closest you'll get to takeout without the grease.
The process starts with a 12-hour buttermilk brine that tenderizes the chicken while adding subtle tang—this step alone makes the difference between soggy and spectacular.
Then comes the popcorn-style coating: a light dusting of flour followed by a double-dip in buttermilk and seasoned panko, ensuring maximum crunch without overwhelming the natural flavor. At 375°F for 12–15 minutes, the air fryer works its magic, delivering golden-brown perfection every time.
What you'll end up with is chicken that's crispy enough to stand up to dipping sauces but tender enough to eat without a fork. The buttermilk brine infuses flavor without making the coating soggy, and the air fryer's rapid heat circulation ensures even crispiness on every piece.
This isn't just another chicken recipe—it's a game-changer for game day, movie nights, or whenever you crave that satisfying crunch.
Serve with classic ranch or honey mustard for dipping, or pile them high on a burger for an elevated twist. The beauty of this method is its versatility—scale it up for parties or make a single serving without sacrificing quality. Let's get cooking!
Ingredients for air fried popcorn chicken
The secret to restaurant-quality popcorn chicken lies in these 11 ingredients—each playing a precise role.
| Ingredient | Amount | Notes |
|---|---|---|
| Boneless, Skinless Chicken Thighs 🍗 | 1 ½ lb | Cut into 1-inch pieces, uniform size |
| Buttermilk 🥛 | 1 cup | Full-fat for optimal tenderness |
| All-Purpose Flour 🌾 | ½ cup | Lightly dusted for initial coating |
| Japanese Panko Breadcrumbs 🍞 | 1 ½ cups | For maximum crispiness (not regular breadcrumbs) |
| Garlic Powder 🧄 | 1 tbsp | Freshly ground preferred |
| Onion Powder 🧅 | 1 tbsp | For aromatic depth |
| Paprika 🌶️ | 1 tbsp | Smoked variety for enhanced flavor |
| Ground Black Pepper 🌶️ | ½ tsp | Freshly cracked for maximum flavor |
| Diamond Crystal Kosher Salt 🧂 | 1 tsp | For balanced seasoning |
| Cornstarch 🌾 | 2 tbsp | Mixed with panko for extra crunch |
| Extra-Virgin Olive Oil 🫒 | 1 tbsp | For light brushing between layers |
The chicken thighs are non-negotiable—dark meat stays juicier during air frying than breasts. Look for thighs with good marbling at specialty butchers or the meat section of Whole Foods or Costco. The buttermilk should be full-fat (none of that low-fat nonsense)—Trader Joe's carries it at a reasonable price. For the panko, Japanese brands like Shiga are worth the splurge; generic breadcrumbs won't give that signature shatter. Pre-portion your chicken into 1-inch pieces before brining to ensure even cooking.
No buttermilk? Substitute with 1 cup milk + 1 tbsp vinegar—let it sit 10 minutes to curdle. Running short on Japanese panko? Mix regular breadcrumbs with 1 tbsp cornstarch for extra crunch. The cornstarch in the panko mixture is critical—it creates that light, airy texture that mimics takeout popcorn chicken. For the spices, garlic and onion powders can be swapped for fresh minced garlic and onion (use 1 tsp each), but the powders dissolve better into the coating. The olive oil brushing between layers isn't just for flavor—it helps the coating adhere while preventing drying.
Brined chicken stays fresh for 3 days in the fridge when stored in an airtight container with paper towels underneath to absorb moisture. The dry panko mixture keeps indefinitely in a sealed container. For make-ahead prep, brine the chicken overnight—this maximizes tenderness. When ready to cook, let the chicken sit at room temperature for 20 minutes before air frying to ensure even crispiness. Leftovers? Re-crisp in the air fryer at 350°F for 3-4 minutes—they'll taste almost as good as fresh.
Why You'll Love This Recipe
- No Fuss Setup: The thighs go in one bowl, the buttermilk soaks them while I prep the rest—no chopping, no stress. Just cut, dip, coat, and air fry. That’s it. My lazy nights thank me every time.
- Crunch Meets Cream: The panko gives you that addictive popcorn texture, but the buttermilk-marinated chicken stays juicy inside. Honestly, it’s the kind of bite that makes people ask for the recipe mid-bite.
- Game Day Gold: I make a double batch on Sundays—it reheats like a dream for game night, potlucks, or when the kids’ friends show up hungry. No one turns down crispy, garlicky chicken bites.
- Budget-Friendly Crunch: Thighs are cheaper than breasts, and panko stretches farther than you’d think. I feed four for under $10, and the leftovers? Perfect for lunchboxes or a quick stir-fry boost. Smart spending, big flavor.
Step-by-step instructions for buttermilk brine popcorn chicken
Here's the method that delivers restaurant-quality crispiness with juicy, tender meat every time.
Prepare the Buttermilk Brine and Cut Chicken
In a large resealable bag, combine the 1 cup buttermilk, 1 tbsp garlic powder, 1 tbsp onion powder, 1 tbsp paprika, 0.5 tsp ground black pepper, and 1 tsp Diamond Crystal kosher salt. Seal the bag and gently massage the mixture until the spices dissolve completely. This creates your flavorful marinade that will tenderize the meat from the inside out.
While the marinade develops, cut the 1.5 lb boneless, skinless chicken thighs into 1-inch pieces, working quickly to maintain uniform size. This even cutting ensures consistent cooking and crisping. Place the chicken pieces in the bag with the marinade, seal tightly, and refrigerate for at least 4 hours or up to 24 hours. The longer it marinates, the more tender and flavorful the result. Here's the thing—don't skip this step. The buttermilk's acidity breaks down proteins, creating that signature juicy texture we're after.
Create the Panko-Cornstarch Coating
In a large bowl, combine the 1.5 cups Japanese panko breadcrumbs, 2 tbsp cornstarch, and any remaining marinade from the bag. The cornstarch is crucial here—it creates an extra-crispy barrier that locks in moisture while delivering that satisfying crunch. Mix thoroughly until you have an even coating mixture that looks like coarse sand.
Remove the chicken from the marinade, letting any excess drip off, and pat dry with paper towels. This drying step is essential—it prevents steam from forming between the chicken and coating, which would otherwise create a soggy result. Working in batches if needed, lightly dust each piece with the 0.5 cup all-purpose flour, then press firmly into the panko-cornstarch mixture, completely encasing each piece. The flour acts as a binder that helps the coating adhere perfectly. Don't rush this—each piece should be fully coated for maximum crispiness.
Air Fry in Batches for Perfect Crispiness
Preheat your air fryer to 375°F for 5 minutes. This preheating ensures even cooking from the start. Arrange the coated chicken pieces in a single layer in the air fryer basket, leaving at least ½ inch between each piece. This spacing allows hot air to circulate freely, creating that perfect crispy exterior.
Air fry for 12 minutes, then carefully flip each piece using tongs. You'll notice the edges start to develop a golden-brown color—that's your signal to flip. Cook for another 8-10 minutes until the chicken reaches an internal temperature of 165°F and the coating is deep golden brown with no white spots remaining. The air fryer's circulating hot air works magic here, creating that signature popcorn chicken texture without excessive oil. Here's where it gets fun—watch the basket for any pieces that might cook faster and adjust accordingly. If needed, move faster-cooking pieces to the outer edges of the basket.
Rest and Serve Immediately
Transfer the cooked chicken to a wire rack set over a baking sheet. This allows any residual moisture to evaporate, keeping the coating crispy. Let the chicken rest for 5 minutes before serving. This brief resting period ensures the juices redistribute throughout the meat, preventing them from pooling and making the chicken soggy.
Serve immediately while still crispy. The chicken should have a golden-brown, crunchy exterior that gives way to juicy, tender meat inside. Each bite should deliver that perfect balance of crispy coating and succulent chicken. For extra flavor, serve with a side of honey mustard or a cool ranch dip. The contrast between the warm, crispy chicken and cool dipping sauce makes this dish irresistible. Real talk: the first few bites are always the best—don't wait too long to serve!
Pro Tips For Making Air Fried Popcorn Chicken
- CRISP IT TWICE: After dredging in flour and panko, hit the air fryer at 375°F for 8 minutes, flip, then crank to 400°F for the last 5. The first low-heat round locks in moisture while the second blast gets that popcorn texture—no soggy centers, no burnt crusts. I learned this the hard way when my first batch came out uneven.
- DON’T SKIP THE DRYING: Pat those chicken thighs thoroughly with paper towels before buttermilk—wet skin means a mushy crust. I used to rush this, and the panko would clump like sad breadcrumbs. Five minutes of drying (yes, even if you’re impatient) makes all the difference.
- USE COLD BUTTERMILK: Chill the buttermilk in the fridge for at least 30 minutes before dipping. Cold buttermilk clings better to the flour coating and keeps the breading from sliding off mid-fry. I was skeptical until I tried it—now I never go back.
- SHORTEN THE SOAK: Dip the chicken in buttermilk for just 10–15 seconds, not the full 30 minutes. Over-soaking makes the thighs rubbery, and the panko turns to paste. Quick dips still tenderize while keeping the popcorn texture crisp. (Your future self will thank you.)
Troubleshooting great air fried popcorn chicken
Uneven Cooking Issues
If your popcorn chicken comes out unevenly cooked—some pieces crispy while others remain pale—it’s usually due to overcrowding in the air fryer. The hot air needs room to circulate, so never fill the basket more than halfway.
I’ve learned this the hard way after cramming too many pieces in and ending up with soggy centers. For 1.5 lbs of chicken, plan for two batches at 375°F. Also, check your air fryer’s manual for maximum capacity—some models like the Ninja Foodi handle more than others. 🔥
Soggy Coating Problems
A soggy coating is almost always caused by moisture trapped between the chicken and the breading. To prevent this, pat your chicken pieces completely dry with paper towels after brining, and let them sit at room temperature for 20 minutes before coating.
Another trick I swear by: brush each piece lightly with 1 tbsp extra-virgin olive oil before dipping in the panko mixture—this creates a barrier that locks in crispiness.
If you’re short on time, skip the oil but double-check your air fryer temperature—it should read 375°F accurately (use an oven thermometer to verify).
Burnt Edges Before Done
When the edges of your chicken turn dark brown or black before the interior reaches 165°F, it’s a sign of overcrowding or excessive heat. First, reduce the temperature to 350°F and cook for 5-10 minutes longer, checking frequently.
I also recommend placing pieces cut-side down in the basket for the first 5 minutes to help them crisp evenly. If you’re using a smaller air fryer (like the Cosori), you may need to cook in single layers with even spacing.
For stubbornly dark edges, a quick 30-second blast in the microwave after air frying can restore crispiness. ✨
Chicken Too Dry
Dry chicken is usually a result of overcooking or skipping the buttermilk brine. First, ensure your chicken is brined for at least 4 hours—this step is non-negotiable for tenderness.
If you’ve already cooked it and it’s dry, try this fix: brush the chicken with 1 tsp honey or 1 tbsp melted butter right after air frying. This adds moisture and richness.
For future batches, reduce cooking time by 1-2 minutes and check the internal temperature with a meat thermometer—165°F is the magic number. Also, avoid using skinless chicken breasts (they’re drier); stick with thighs for juiciness. 💫
Coating Falling Off
The coating detaching mid-cook is almost always due to poor adhesion or rushing the process. Start by dusting chicken with flour before the panko mixture—this acts as a glue. Press the coating firmly onto each piece, and don’t double-dip (this weakens the breading).
If you’re in a hurry, chill the coated chicken in the fridge for 15-20 minutes before air frying—this helps the coating set. For extra grip, mix 1 tbsp cornstarch into your panko (as in the recipe).
If coating still falls off, your chicken might be too wet—pat it extra dry before coating. 💪
Nutrition facts
Frequently asked questions
Can I use chicken breasts instead of thighs for this recipe?
Chicken breasts will work, but thighs are ideal for air fried popcorn chicken. Breasts cook faster and can dry out, losing that juicy texture we want. If using breasts, cut them into ½-inch pieces, brine for only 2-3 hours (not overnight), and reduce cooking time to 10-12 minutes total. For best results, stick with thighs—they stay moist and handle the air fryer's heat better.
How do I make this recipe gluten-free?
Replace the all-purpose flour with ½ cup gluten-free flour blend and use gluten-free panko breadcrumbs (like Bob's Red Mill). The cornstarch in the coating can stay the same. For extra crispiness, add 1 tbsp arrowroot powder to the panko mixture. Just be sure to pat the chicken extra dry—gluten-free coatings can be more prone to sticking if moisture remains.
What's the best way to reheat leftover popcorn chicken?
Place leftover pieces in the air fryer at 350°F for 3-4 minutes to restore crispiness. For stovetop, heat in a dry skillet over medium heat for 2-3 minutes per side. Microwaving will make the coating soggy—never use it for reheating. The key is high heat and quick cooking to avoid steaming the breading.
Can I use frozen chicken for this recipe?
Yes, but thaw it completely first. Place frozen chicken pieces in a sealed bag with cold water for 1 hour, then pat dry thoroughly. The buttermilk brine should still be at least 4 hours—frozen chicken needs extra time to absorb flavors. For best results, thaw overnight in the fridge rather than using quick methods.
Why does my air fryer popcorn chicken taste different from takeout?
Takeout versions often use frying oil (like peanut or vegetable oil) which adds richness. For closer flavor, try brushing the cooked chicken with 1 tsp melted butter or a light coating of honey mustard sauce after air frying. The buttermilk brine in this recipe actually mimics takeout's tangy flavor—just add a pinch of MSG** (½ tsp) to the panko coating for that extra umami kick.