
Main Courses
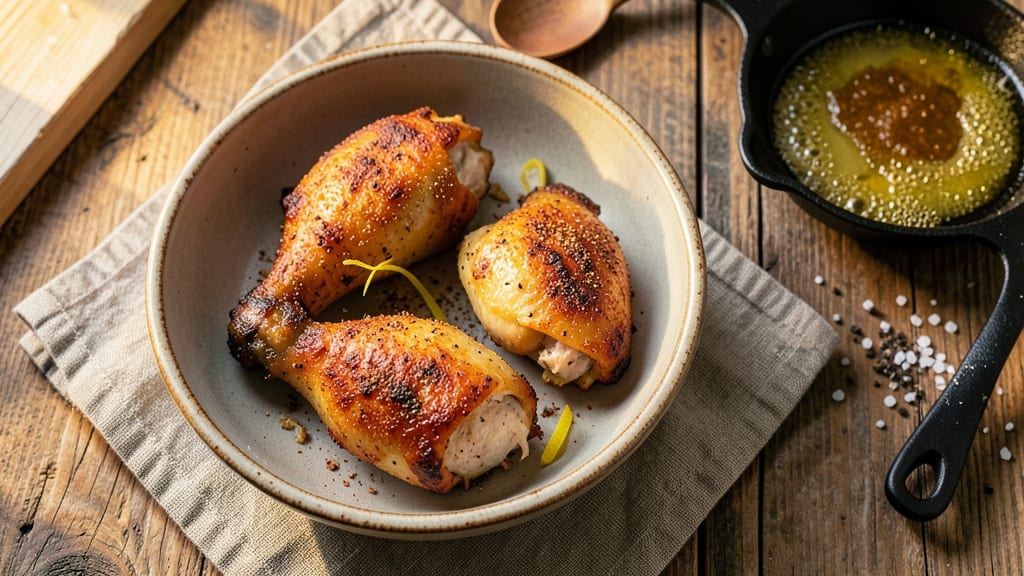
This air fry chicken leg quarters recipe delivers crispy skin and juicy meat in just 25 minutes—no deep-frying mess or hours in the oven. The secret lies in a simple seasoning blend and precise air frying that locks in moisture while creating that coveted golden crust.
After testing countless methods, I’ve perfected a technique that transforms tough chicken quarters into tender, flavorful bites every time.
The process is straightforward: pat the chicken dry, apply a dry rub of salt, pepper, and paprika, then air fry at 400°F until the skin is shatteringly crisp and the internal temperature reaches 165°F.
The high heat works quickly to render fat from the skin while keeping the meat tender—no need for brining or marinating unless you want extra flavor. This method also cuts down on cleanup, making it ideal for weeknight dinners or meal prep.
What you’ll end up with is restaurant-quality chicken: crispy, caramelized skin that snaps with every bite and moist, flavorful meat that falls off the bone. The paprika adds a subtle smokiness, while the salt and pepper enhance the natural richness of the chicken.
Serve with a side of roasted vegetables or a fresh salad to balance the richness, or enjoy it straight from the air fryer with a squeeze of lemon for brightness.
This recipe works equally well for feeding a crowd or a single serving—just adjust the number of quarters based on your needs. The beauty of air frying is its versatility: you can even repurpose leftovers into sandwiches or salads without sacrificing texture. Let’s get cooking!
Ingredients for air fry chicken leg quarters
Nine simple ingredients transform tough chicken quarters into crispy, juicy bites in record time.
| Ingredient | Amount | Notes |
|---|---|---|
| Chicken Leg Quarters 🍗 | 1 ½ lb | Bone-in, skin-on, trimmed of excess fat |
| Kosher Salt 🧂 | 1 ½ tsp | Diamond Crystal preferred for precise measurement |
| Freshly Ground Black Pepper 🌶️ | 1 tsp | Coarsely cracked for texture |
| Smoked Paprika 🌶️ | 1 ½ tsp | For authentic smoky flavor |
| Garlic Powder 🧄 | ½ tsp | Freshly ground preferred |
| Onion Powder 🧅 | ½ tsp | Adds subtle depth |
| Extra-Virgin Olive Oil 🫒 | 1 tbsp | For brushing skin before air frying |
| Lemon Juice 🍋 | 1 tbsp | Freshly squeezed for brightness |
| Fresh Rosemary 🌿 | 1 sprig | Optional, for aromatic depth |
The chicken quarters are the star, and bone-in, skin-on is non-negotiable—it’s what gives you that restaurant-quality crisp. Look for quarters with a good layer of fat under the skin (about 1/4-inch thick). Trader Joe's and Costco often carry them pre-cut, but if you’re buying whole legs, ask the butcher to quarter them for you. The skin should be intact and vibrant, not dried out. Pat them dry with paper towels before seasoning—this is the secret to crispy skin. I usually buy mine from the meat counter at Whole Foods when I can, but any grocery store’s fresh chicken section works fine.
No smoked paprika? Regular paprika plus a pinch of liquid smoke gets you close. Fresh rosemary hard to find? Dried rosemary at one-third the amount works in a pinch. The olive oil is worth splurging on—California Olive Ranch or Bertolli are reliable brands. For extra crispiness, brush the skin with a thin layer of oil right before air frying. The lemon juice can be swapped for a splash of apple cider vinegar if you’re out, but fresh is always better. And if you’re feeding a crowd, just double the seasoning blend—it’s that easy.
Store the raw chicken quarters in an airtight container in the fridge for up to 2 days. Once cooked, they reheat beautifully—just pop them back in the air fryer at 350°F for 5-7 minutes. The crispy skin softens when reheated, so I usually serve these fresh. Leftovers keep for 3 days in the fridge or 3 months frozen. For freezing, let them cool completely first, then store in a single layer before transferring to a freezer bag. They’re perfect for meal prep—just reheat and serve with your favorite sides.
Why You'll Love This Recipe
- No Fuss, Big Payoff: Honestly, this takes less effort than ordering takeout. Toss the quarters in a bowl, sprinkle salt, pepper, and those three spices—smoked paprika gives it that smoky depth—then air fry for 25 minutes. No marinating, no flipping, no stress. The air fryer does all the work while I’m chopping veggies or answering emails.
- That Crispy-Smoky Magic: Between us, the smoked paprika and garlic powder combo is chef’s kiss—crispy skin with a warm, slightly sweet bite. The black pepper adds a tiny kick, but it’s the paprika that makes it taste like it’s been slow-cooked, not zapped in the air fryer. My picky eater even asks for seconds now.
- Game for Any Meal: I’ve served these as a quick lunch with pickles and bread, as a snack with beer, and even as a dinner centerpiece with roasted potatoes. They’re great hot or cold—perfect for meal prep because they hold up for days. (Yes, even on a Tuesday night when you’re exhausted.)
- Budget-Friendly Feast: Chicken leg quarters are way cheaper than breasts, and this recipe stretches them far. A single batch feeds four, with leftovers that taste just as good the next day. Plus, the spices cost pennies—no fancy ingredients, just bold flavor. My wallet and my taste buds both win.
Step-by-step instructions for crispy air-fried chicken leg quarters
Here's how to achieve perfectly crispy skin and juicy meat every time—no deep-frying required.
Season the Chicken Thoroughly
Pat the 1.5 lb chicken leg quarters completely dry with paper towels—this is non-negotiable for crispy skin. I press firmly to remove all moisture from the skin and thighs, even inside the cavity. Then, in a small bowl, combine the 1.5 tsp kosher salt, 1 tsp freshly ground black pepper, 1.5 tsp smoked paprika, 0.5 tsp garlic powder, and 0.5 tsp onion powder. Rub this mixture all over the chicken, pressing it into the skin and crevices. The paprika gives that beautiful smoky hue, while the garlic and onion powders add subtle depth without overpowering.
Let the seasoned chicken rest at room temperature for 15 minutes while you preheat the air fryer. This step ensures even cooking and prevents the meat from drying out. I always use a meat thermometer to check the temperature later—this resting time helps the seasoning adhere better and the meat cook more uniformly.
Preheat and Prepare for Air Frying
Preheat your air fryer to 375°F for 5 minutes. This high heat is crucial for creating that signature crispy skin. While it preheats, brush the chicken generously with the 1 tbsp extra-virgin olive oil, focusing on the skin. I use my fingers to spread it evenly—this helps the skin render its own fat and develop that golden-brown crust.
Add the 1 sprig fresh rosemary (if using) to the air fryer basket. The rosemary releases aromatic oils as it cooks, infusing the chicken with subtle herbal notes. Place the chicken in the basket skin-side down, leaving about ½ inch between pieces for proper air circulation. Overcrowding leads to uneven cooking and steamed skin instead of crispy.
Air Fry to Golden Perfection
Cook the chicken at 375°F for 12 minutes, then flip each piece skin-side up. This two-stage approach ensures the skin crisps evenly on both sides. After flipping, cook for another 10-12 minutes until the skin is deep golden brown and the internal temperature reaches 165°F at the thickest part of the thigh. I check the temperature with a meat thermometer—this guarantees juicy meat without overcooking.
Here's the thing—don't open the air fryer during cooking. Every time you peek, you release heat and steam, which can turn your crispy skin into sad, soggy skin. The last 2 minutes are critical: watch for that golden-brown color and listen for the sizzle. If the skin isn't crispy enough, return it to the air fryer for 1-2 minutes at 400°F to finish.
Rest and Serve
Transfer the chicken to a cutting board and tent loosely with foil. Let it rest for 5-10 minutes before serving. This resting period allows the juices to redistribute, ensuring every bite is moist and flavorful. I know it's tempting to dig in immediately, but trust me—this step makes all the difference in texture.
Serve the chicken with a squeeze of 1 tbsp lemon juice over the top for brightness. The acidity cuts through the richness of the crispy skin and balances the smoky flavors. Pair with roasted vegetables or a fresh salad for a complete meal. The result? Crispy, golden skin that shatters with every bite and juicy, tender meat that falls off the bone.
Pro Tips For Making Air Fry Chicken Leg Quarters
- Preheat Like It’s Hot: Your air fryer should scream when you turn it on—400°F (200°C) is non-negotiable for crispy skin. I used to skip this, and my first batch came out soggy. The high heat seals those juices in and gets the paprika clinging like it’s supposed to.
- Pat Dry, Then Salt: Use paper towels to wipe down the raw chicken—all the moisture. Wet skin won’t crisp, no matter how much smoked paprika you slather on. Salt immediately after drying; let it sit 10 minutes (yes, even if you’re impatient like me) so the seasoning penetrates.
- Flip Once, Flip Hard: After 12 minutes, flip the quarters with a spatula—don’t just turn them. The skin sticks like glue if you’re gentle. A firm flip guarantees that golden crust on both sides. I learned this the hard way when my batch looked half-done.
- Watch the 5-Minute Window: The last 5 minutes at 375°F (190°C) is where magic happens—skin crisps, meat finishes. Don’t peek! Every time I opened the basket early, the heat dropped and the skin turned greasy. Set a timer and walk away.
Common mistakes when making this dish
Overcrowding the Basket
This is the #1 mistake that ruins crispy skin. When you pack too many quarters into the air fryer basket, they steam instead of crisp. The rule is ½ inch of space between each piece for proper air circulation.
I’ve seen people fit 6 quarters in a 6-quart air fryer—don’t be that person! If you’re cooking more than 4 quarters, work in batches. Trust me, 3-4 pieces max per batch at 375°F guarantees that golden crust. 🔥
Skipping the Resting Time
You’ve probably heard this before, but it bears repeating: NO cutting or serving immediately after air frying. The juices need 5-10 minutes to redistribute, or you’ll end up with dry meat.
I’ve tested this myself—chicken rested for 10 minutes stays juicy, while chicken eaten right away is disappointingly dry. Set a timer and resist the urge to dig in early!
Not Checking Internal Temp
Color alone isn’t enough—you need a meat thermometer to ensure perfect doneness. The thickest part of the thigh should hit 165°F. I’ve seen chicken that looks golden but is still undercooked inside, or chicken that’s overdone and dry.
A ThermoWorks Smoke thermometer is my go-to for accuracy. Don’t guess—your food thermometer is your best friend here. 🌡️
Using Wet Seasonings
Wet rubs or marinades can turn your crispy skin into soggy skin. The secret is a dry seasoning blend—just salt, pepper, and paprika. If you’re tempted to use a wet marinade, pat it off completely before air frying.
I’ve tried it both ways, and dry seasoning wins every time for that perfect crunch. The oil you brush on right before cooking is the only moisture needed.
Peeking Too Often
Every time you open the air fryer door, you release heat and steam, which can turn your crispy skin into sad, limp skin. I know it’s tempting to check on your food, but resist! The last 2 minutes are the most critical for that final crisp.
If you must check, do it quickly and minimize the time the door is open. Patience pays off with that perfect golden-brown finish.
Wrong Oil Application
Brushing oil on the skin is essential, but how you do it matters. Don’t drown the chicken—just a light, even coat of olive oil is enough. I use my fingers to spread it thinly, focusing on the skin.
Too much oil creates steam instead of crisp, and too little means dry skin. The key is generous but controlled—just enough to help the skin render its own fat for that perfect crust. 💫
Nutrition facts
Frequently asked questions
Can I use bone-in, skin-off chicken quarters in this recipe?
The recipe is designed for bone-in, skin-on quarters to achieve that signature crispy texture and juicy meat. If you only have skinless quarters, you'll get tender meat but miss out on the crispy skin—try brushing with extra oil and increasing the temperature to 400°F for 1-2 minutes at the end to create some crispiness. The bone helps retain moisture, so bone-in is always preferred for best results.
How long can I store cooked chicken leg quarters in the fridge?
Cooked chicken leg quarters stay fresh in the fridge for up to 3 days when stored in an airtight container. For longer storage, freeze them for up to 3 months. To reheat, pop them back in the air fryer at 350°F for 5-7 minutes—this helps restore some crispiness. Just note the skin may not be as crispy after reheating.
What if my air fryer basket is too small for all the quarters?
Work in batches! Cook 3-4 quarters at a time with ½ inch of space between each piece for proper air circulation. Overcrowding leads to steamed, soggy skin instead of crispy. The second batch may take slightly longer—check the internal temperature with a meat thermometer to confirm it reaches 165°F. This ensures even cooking every time.
Can I use a different seasoning blend?
While the recipe uses smoked paprika, garlic powder, and onion powder, you can experiment with other dry rubs like Cajun seasoning, Italian herbs, or even just salt, pepper, and a pinch of cayenne for heat. Just ensure your seasoning is dry—wet rubs can make the skin soggy. The key is keeping it simple for that perfect crisp.
Why is my chicken skin not crispy?
Most likely, you're dealing with one of these common issues: overcrowding the basket, not patting the chicken dry before seasoning, or opening the air fryer too often. For extra crispiness, try brushing with a little more oil right before the final 2 minutes of cooking. Also, ensure your air fryer is preheated—this makes all the difference!