
Sauces & Condiments
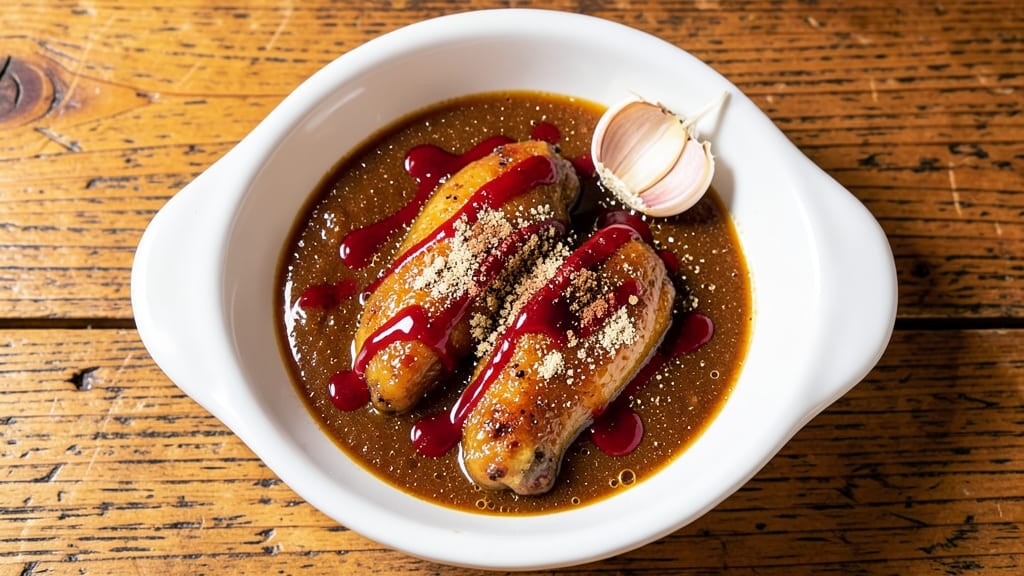
This baked chicken wings sauce recipe delivers a perfect balance of smoky depth, sweet honey, and a tangy kick that elevates any wing—no deep-frying required. The secret lies in a simple glaze of honey, garlic, and spices that caramelizes beautifully during baking, creating a sticky, flavorful crust.
I developed this after years of experimenting with sauces that either drowned wings in grease or left them dry, and this version solves both problems with precision and ease.
The sauce combines honey and hot sauce for that signature sweet-and-spicy profile, while smoked paprika and garlic powder add warmth without overpowering. What sets this apart is the slow reduction at the end, which thickens the glaze just enough to cling to wings without making them soggy.
This isn’t just another wing sauce—it’s a foolproof method that transforms ordinary baked wings into restaurant-quality bites.
By the time you’re done, your wings will be coated in a glossy, caramelized glaze that’s sticky, smoky, and perfectly balanced—no messy dipping required. The sauce keeps well in the fridge for up to a week, so you can make a big batch and use it again and again.
Whether you’re hosting a game day or craving wings on a weeknight, this glaze delivers bold flavor with minimal effort.
Pair it with crispy baked wings (or your favorite cooking method) for a sauce that’s simple to make but impossible to resist. Let’s get started—your taste buds will thank you.
Ingredients for baked chicken wings sauce
Sweet, smoky, and tangy—this sauce transforms wings into restaurant-quality bites.
| Ingredient | Amount | Notes |
|---|---|---|
| Honey 🍯 | ½ cup | Raw or pure for best flavor |
| Hot Sauce 🌶️ | ¼ cup | Like Frank's RedHot or Cholula |
| Smoked Paprika 🌶️ | 1 tbsp | For authentic smoky flavor |
| Garlic Powder 🧄 | 1 ½ tbsp | Freshly ground preferred |
| Onion Powder 🧅 | 1 tbsp | Adds subtle depth |
| Apple Cider Vinegar 🍎 | 1 tbsp | For tangy brightness |
| Soy Sauce 🍜 | 1 tbsp | Use low-sodium for balance |
| Brown Sugar 🍚 | 1 tbsp | Enhances caramelization |
| Extra-Virgin Olive Oil 🫒 | 1 tbsp | For glossy finish |
| Salt 🧂 | ½ tsp | Kosher or sea salt |
Honey is the star here, so grab the raw or pure kind—it’s got more flavor than the processed stuff. For hot sauce, Frank's RedHot or Cholula are my go-tos, but any brand with a kick works. Smoked paprika makes all the difference—Penzeys or the bulk bins at Whole Foods have the best quality. If you’re feeling fancy, toast the garlic powder in a dry pan for 30 seconds to deepen its flavor (trust me on this). The apple cider vinegar adds that perfect tang—don’t skip it, even if you’re not a fan of vinegar in other dishes.
No hot sauce? Sriracha plus a splash of water works in a pinch, but it’ll be less tangy. Running low on smoked paprika? Regular paprika plus a pinch of liquid smoke gets you close. The soy sauce can be swapped for coconut aminos if you’re avoiding gluten. Brown sugar substitutes? Maple syrup or coconut sugar both work, but brown sugar’s molasses notes are key here. And if you’re out of olive oil, avocado oil is a great stand-in—just use the same amount.
This sauce keeps for up to a week in the fridge, sealed in a jar. I like to make a double batch—one for wings and one to drizzle over roasted veggies or even grilled chicken. If you’ve got extra, freeze it in ice cube trays for single-use portions. Just thaw overnight in the fridge before using. The glaze thickens as it cools, so give it a quick stir and maybe a splash of water if it’s too stiff when you’re ready to use it.
Why You'll Love This Recipe
- Five-Ingredient Magic: I swear by this combo—honey’s sticky sweetness balances the heat from hot sauce, while smoked paprika gives it that smoky depth. No fancy techniques, just whisk and toss.
- Crowd-Pleaser Balance: Between us, this sauce hits every craving: sweet, spicy, and just a little smoky. My picky-eating nephew loves it, and my partner’s the first to finish the plate.
- Weeknight Superstar: Toss wings in the sauce, bake, and boom—done in 40 minutes. No takeout menus, no last-minute stress, just wings that taste like they came from a food truck.
- Leftovers That Shine: The sauce clings perfectly, so reheating is a breeze. I’ve served these cold the next day in wraps, and they’re just as addictive—no soggy disappointment here.
Step-by-step instructions for smoky garlic-honey glaze
Here's how to whip up this addictive sauce that balances sweet, smoky, and tangy flavors perfectly.
Whisk Together Wet Ingredients for Smooth Base
In a medium bowl, combine the 0.5 cup honey and 0.25 cup hot sauce. Stir until fully blended—this creates the foundational sweetness and heat balance. I like to use a fork first to break up any honey clumps before whisking thoroughly. The mixture should look uniform with no visible streaks of honey.
Next, add the 1 tbsp apple cider vinegar and 1 tbsp soy sauce. Whisk vigorously for about 30 seconds until everything is completely incorporated. You'll notice the sauce start to thicken slightly as the vinegar and soy sauce meld with the honey. This step is crucial for developing the sauce's complex flavor profile right from the beginning.
Add Dry Seasonings and Brown Sugar
To the wet mixture, sprinkle in the 1.5 tbsp garlic powder, 1 tbsp onion powder, 1 tbsp smoked paprika, 1 tbsp brown sugar, and 0.5 tsp salt. Use a whisk to break up any clumps of powdered ingredients, then stir continuously for about 1 minute until everything dissolves completely.
The smoked paprika will give the sauce its signature smoky aroma, while the brown sugar enhances caramelization when baked. I always use freshly ground garlic powder here—the difference in flavor is noticeable compared to pre-ground versions. Stir until you can't see any dry powder at the bottom of the bowl.
Incorporate Olive Oil for Glossy Finish
Drizzle in the 1 tbsp extra-virgin olive oil while whisking continuously. The oil helps create that beautiful glossy finish on the wings and prevents the sauce from becoming too thick when applied. Whisk for another 30 seconds until the sauce reaches a smooth, pourable consistency.
At this point, the sauce should be vibrant in color—think deep amber with hints of red from the hot sauce. Taste it now (before baking) to check the balance. You want a perfect harmony of sweet, smoky, spicy, and tangy flavors. If it needs more heat, add a pinch of cayenne; if it needs more depth, a splash of vinegar helps.
Simmer for Enhanced Flavor Development
Transfer the sauce to a small saucepan and place it over medium-low heat. Bring to a gentle simmer, then reduce heat to maintain a barely bubbling state. Let it cook uncovered for 5-7 minutes, stirring occasionally with a wooden spoon.
This simmering step intensifies all the flavors by evaporating some of the liquid, which concentrates the taste. You'll notice the sauce thickens slightly and becomes more aromatic. Watch carefully—you don't want it to boil vigorously, just maintain a gentle simmer. Remove from heat once it reaches your desired consistency, which should be thick enough to coat the back of a spoon but still pourable.
Cool and Prepare for Application
Let the sauce cool completely at room temperature. This cooling step is important—it allows all the flavors to fully meld together. If you apply warm sauce to hot wings, you'll end up with a watery glaze instead of the perfect sticky coating we're after.
Once cooled, transfer the sauce to a small bowl or ramekin that will fit in your oven. The sauce should now have a beautiful glossy sheen and be ready to transform your baked chicken wings into finger-licking masterpieces. This sauce keeps well in the refrigerator for up to 2 weeks, making it perfect for meal prep or entertaining.
Pro Tips For Making Baked Chicken Wings Sauce
- Whisk the Honey First: Heat your honey in the microwave for 10 seconds before mixing it into the sauce—it dissolves smoother and coats the wings better. I used to just dump it in cold, and the sauce would clump like syrup on a summer picnic table.
- Balance the Heat: Taste your sauce before tossing it on the wings—if the hot sauce dominates, add a splash of honey or a pinch of smoked paprika to mellow it out. I’ve ruined batches by going straight for the spice; the flavors need room to breathe.
- Skip the Boiling Sauce: Never simmer the sauce—just whisk it together and toss it on warm wings. Boiling turns the honey grainy and dulls the smoky depth. Trust me, the sauce stays vibrant when you keep it raw and lively.
- Dry Wings First: Pat the wings completely dry with paper towels before baking—moisture traps heat and steams the sauce instead of caramelizing it. I learned this the hard way when my wings came out soggy and sad, no matter how good the sauce was.
Common mistakes when making great baked chicken wings sauce
Over-Simmering Ruins
Watch that saucepan like a hawk—once the sauce starts to bubble vigorously, it’s too late. Over-simmering burns the honey and makes the sauce bitter. I’ve ruined batches by walking away for just 2 minutes while it boiled hard.
Keep heat at medium-low and stir every 30 seconds to prevent scorching. If you see dark streaks forming, remove it immediately and stir in 1 tsp water to dilute. 🔥
Skipping the Cooling Step
Applying warm sauce to hot wings is a recipe for disaster—it’ll turn watery and slide right off. Always let the sauce cool completely before using.
I’ve seen people brush it on right after simmering, only to end up with sad, sticky wings that look more like a science experiment than food. Patience here pays off with that perfect glossy finish. ⏰
Using Low-Quality Honey
Not all honey is created equal. Cheap, processed honey lacks depth and can make your sauce taste artificial. I’ve tried store-brand honey in this recipe, and it just doesn’t cut it.
Invest in raw or pure honey—the kind you’d drizzle on pancakes. The flavor difference is night and day, especially when caramelized. 🍯
Ignoring the Glossy Finish
That 1 tbsp olive oil isn’t just for flavor—it’s what gives the sauce its signature shine and prevents it from clumping. I’ve made this sauce without oil, and while it still tasted great, the wings looked dull and the sauce stuck unevenly. Whisk it in thoroughly for that restaurant-quality sheen.
Over-Mixing Dry Ingredients
When adding the powders, stir just until dissolved—no need to beat them into oblivion. Over-mixing can create lumps or even a grainy texture. I’ve seen people whisk these ingredients for 2 minutes straight, only to end up with a gritty sauce.
A gentle 1-minute stir is all you need. ✨
Not Tasting Mid-Process
Never assume the sauce is balanced until you taste it. I’ve made batches where the heat from the hot sauce overwhelmed the sweetness, or vice versa. Taste after combining wet ingredients, then again after adding dry spices.
Adjust with more honey for sweetness, vinegar for tang, or cayenne for heat. Your taste buds are your best tool here.
Nutrition facts
Frequently asked questions
Can I make this sauce without honey?
Yes, but the flavor will change significantly. For a similar caramelization, try maple syrup or brown sugar syrup (simmer 1/3 cup brown sugar + 2 tbsp water until dissolved). If you need a non-sweet option, substitute with apple cider or balsamic vinegar and reduce the hot sauce slightly to balance the tang.
How do I adjust the heat level?
Start with the recipe as written, then taste and adjust. For milder heat, reduce hot sauce to 2 tbsp and add 1/2 tsp extra honey. For spicier wings, add 1/4 tsp cayenne pepper or swap in 1 tbsp hot sauce with extra heat (like Tabasco). Always taste before applying to wings!
Can I use this sauce on other meats?
This glaze works beautifully on grilled chicken thighs, ribs, or even tofu for a vegan option. For ribs, brush on after the fall-off-the-bone stage. For chicken thighs, apply during the last 10-15 minutes of baking. The sauce's balance of sweet and smoky flavors translates well to other proteins.
Why did my sauce turn grainy?
Graininess usually means the dry ingredients weren't fully dissolved. Stir them in slowly while whisking continuously, and avoid using cold honey (warm it slightly first). If it happens, strain the sauce through a fine-mesh sieve before using. For future batches, whisk the dry ingredients with 1 tsp warm water first to create a smooth paste before adding to the wet mixture.
How long before baking should I apply the sauce?
Apply the cooled sauce 15-20 minutes before the wings finish baking. This gives it time to caramelize and stick properly. For extra shine, brush on a second coat 5 minutes before the end. If your oven runs hot, reduce to 375°F to prevent burning the sauce before the wings are done.