
Main Courses
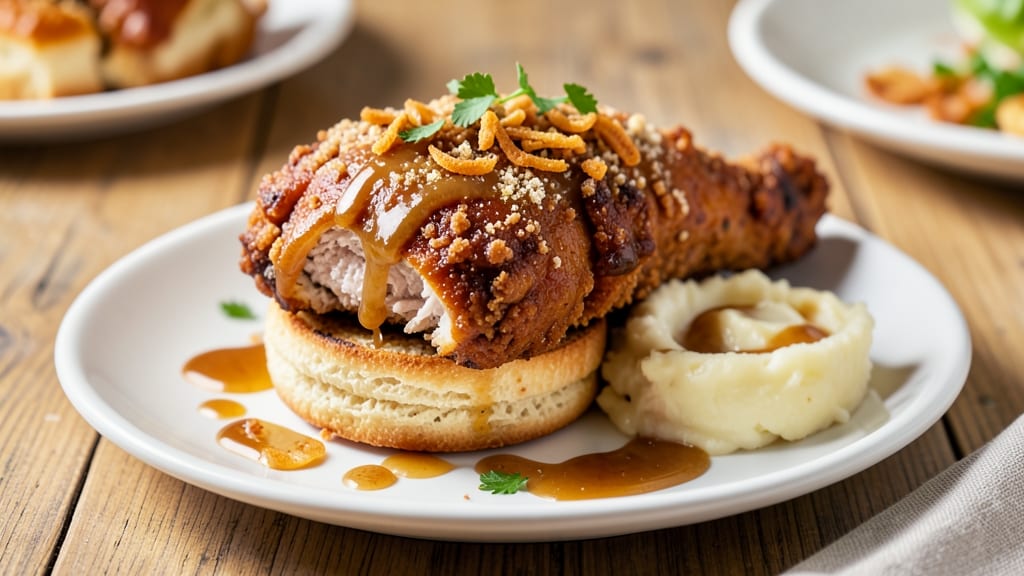
Applebee's Chicken Fried Chicken recipe delivers that signature crispy, golden-brown crust and tender, juicy meat you crave after a long day. 🔥 The secret lies in a buttermilk brine that tenderizes the chicken overnight, followed by a triple-dredge in seasoned flour for maximum crunch.
This isn't just fried chicken—it's a restaurant-quality dish with a creamy white gravy that ties everything together.
What sets this recipe apart is the high-heat frying technique—cooking the chicken in small batches ensures even browning without steaming the coating. The buttermilk marinade works its magic while you sleep, while the flour dredge creates that signature shatteringly crisp exterior that Applebee's is famous for.
Every bite delivers the perfect balance of tender meat and crunchy coating.
Serve this foolproof dish with classic sides like creamy mashed potatoes and fluffy biscuits for the full Applebee's experience. The white gravy adds that final touch of richness, making it impossible to resist seconds.
Whether you're cooking for a crowd or treating yourself to a comfort-food night in, this recipe delivers restaurant-quality results at home.
The key to success is patience—letting the buttermilk work its magic and frying at the right temperature (350°F) ensures perfect results every time. Once you try this version, you'll never settle for anything less than that triple-dredged crunch again. Let's get cooking!
Ingredients for applebee's chicken fried chicken
Fourteen ingredients deliver that signature Applebee's crunch and juicy magic.
| Ingredient | Amount | Notes |
|---|---|---|
| Boneless, Skinless Chicken Thighs 🍗 | 1 ½ lb | Trimmed of excess fat for even cooking |
| Buttermilk 🥛 | 1 ½ cups | Full-fat for optimal tenderness |
| All-Purpose Flour 🌾 | 3 cups | White flour for classic texture |
| Cornstarch 🌾 | 1 tbsp | For ultra-crispy coating |
| Diamond Crystal Kosher Salt 🧂 | 1 ½ tsp | Fine grain preferred |
| Ground Black Pepper 🌶️ | 1 tsp | Freshly ground for best flavor |
| Garlic Powder 🧄 | 1 tsp | For subtle depth of flavor |
| Onion Powder 🧅 | 1 tsp | Enhances savory notes |
| Paprika 🌶️ | ½ tsp | Smoked variety for authentic taste |
| Vegetable Oil 🫒 | 3 cups | High smoke point for frying |
| Unsalted Butter 🧈 | ½ cup | For creamy white gravy |
| All-Purpose Flour 🌾 | ½ cup | For thickening gravy |
| Chicken Broth 🍲 | 1 cup | For rich gravy base |
| Fresh Parsley 🌿 | ¼ cup | Chopped for garnish |
The chicken thighs are non-negotiable—dark meat stays juicier than breasts during the long frying process. Look for bone-in, skin-on thighs at Costco or your local butcher for the best texture, but boneless works too if you're short on time. The buttermilk? Full-fat is key here—it creates that perfect balance of tang and creaminess that tenderizes the meat overnight. If you're in a pinch, substitute with milk plus 1 tbsp lemon juice and 1 tbsp vinegar, but the flavor won't be quite the same. For the flour, White Lily or Gold Medal brands work best—they have the right protein level for that signature crisp.
No buttermilk? Substitute with whole milk plus 1 tbsp vinegar or lemon juice, but let it sit for 10 minutes to curdle properly. The cornstarch in the flour mixture is what gives that shatteringly crisp exterior—don't skip it! For the spices, Penzeys or McCormick are my go-to brands, but honestly, whatever you've got in your pantry will work. The vegetable oil should have a high smoke point—Crisco or vegetable oil from the grocery store both work perfectly. And if you're making gravy, low-sodium chicken broth keeps the flavor balanced without being overwhelming.
This recipe is all about patience—let the buttermilk marinade work its magic for at least 4 hours, preferably overnight. The fried chicken keeps best in the fridge for 2 days if you're not serving it immediately, but honestly, it's even better the next day once the crust has had time to fully set. The gravy can be made ahead and reheated—just add a splash of milk or broth to loosen it up. For leftovers, store the chicken and gravy separately, and reheat the chicken in the oven at 350°F for 15 minutes with a splash of broth to keep it moist.
Why You'll Love This Recipe
- No-Fuss Breading: I swear by the flour-cornstarch mix—it’s the secret to that signature crunch without fussing with double-dredging. Just toss the thighs in buttermilk, dip in the dry blend, and fry. Done. (Yes, even on a Tuesday night when you’re exhausted.)
- Buttermilk Magic: That buttermilk marinade? It’s what turns ordinary chicken into something dangerously tender. The thighs stay juicy while the crust gets crispy—no dry bites here, just pure satisfaction with every bite.
- Weeknight Crowd-Pleaser: Between us, this is my go-to for game days or lazy Sundays. The kids love picking out their pieces, and honestly? It’s the one dish where no one complains about leftovers.
- Budget Meal Hero: Chicken thighs are cheaper than breasts, and this recipe stretches further than takeout. Freeze extras for later—trust me, you’ll thank yourself when you reheat that crispy perfection without the $15 tab.
Step-by-step instructions for Applebee's-style chicken fried chicken
Here's the secret to that legendary triple-dredged crunch and buttery gravy.
👨🍳 Step 1: Brine the Chicken in Buttermilk for Maximum Tenderness
Place the 1.5 lb boneless, skinless chicken thighs in a resealable plastic bag and add the 1.5 cups buttermilk. Seal the bag and gently massage the thighs to coat evenly. Let them marinate in the refrigerator for 4-6 hours or overnight for maximum tenderness.
This step works magic—full-fat buttermilk breaks down the proteins and adds moisture that prevents dryness during frying. I like to flip the bag every few hours to ensure even coating. If you're short on time, at least 2 hours will help, but overnight gives the best results.
👨🍳 Step 2: Create the Triple-Dredge Coating
In a large bowl, whisk together the 3 cups all-purpose flour, 1 tbsp cornstarch, 1.5 tsp Diamond Crystal kosher salt, 1 tsp ground black pepper, 1 tsp garlic powder, 1 tsp onion powder, and 0.5 tsp paprika. This is your dry coating—don't skip the cornstarch, it's what creates that ultra-crispy texture.
Remove the chicken from the buttermilk and let any excess drip off. Working in batches, dredge each piece in the flour mixture, pressing gently to adhere. Shake off excess, then dip back in the buttermilk, and dredge again. Repeat this triple-dredge process for maximum crunch. Place the coated chicken on a wire rack set over a baking sheet and let it rest for 15 minutes—this helps the coating adhere better.
🔥 Step 3: Fry to Golden Perfection
Heat 3 cups vegetable oil in a deep skillet or Dutch oven to 350°F. Use a thermometer to monitor the temperature—it should stay steady. Fry the chicken in batches (don't overcrowd) for 6-8 minutes per side until golden brown. The internal temperature should reach 165°F.
Here's the thing—the oil temperature is critical. If it's too hot, the outside will burn before the inside cooks. If it's too cool, the coating won't crisp properly. You'll know it's ready when the chicken releases easily from the rack and the coating is deep golden brown. Drain on a wire rack (not paper towels) to keep it crispy.
🥘 Step 4: Make the Creamy White Gravy
In the same skillet (don't wipe it clean—those browned bits are pure flavor), melt the 0.5 cup unsalted butter over medium heat. Whisk in the 0.5 cup all-purpose flour and cook for 1-2 minutes until bubbly. Slowly pour in the 1 cup chicken broth, whisking constantly to prevent lumps.
Simmer for 5-7 minutes until the gravy thickens enough to coat the back of a spoon. Season with additional salt and pepper if needed. The gravy should be smooth and velvety—if it's too thick, whisk in a splash of warm water or milk. Keep it warm until serving.
🍽️ Step 5: Serve with Gravy and Fresh Parsley
Transfer the fried chicken to a serving platter and spoon the warm gravy over the top. Garnish with chopped 0.25 cup fresh parsley for a pop of color. Serve immediately with mashed potatoes or biscuits—this is where the magic happens.
Each bite should deliver that perfect balance of crispy exterior and tender, juicy interior with that rich, creamy gravy clinging to every piece. The triple-dredge technique is what makes this version stand out—it's worth the extra effort for that restaurant-quality crunch.
Pro Tips For Making Applebee'S Chicken Fried Chicken
- Dry the Thighs Thoroughly: I learned this the hard way—skipping this step means a soggy crust. Pat the boneless thighs extra dry with paper towels, especially after the buttermilk soak, or the flour coating won’t stick like it should. Wet spots turn to steam in the hot oil, and that’s how you end up with a sad, greasy mess instead of crispy perfection.
- Use a 50/50 Flour Mix: The recipe calls for all-purpose flour, but I’ve found mixing half with cornstarch (about 1 cup each) gives that signature Applebee’s texture—crispy outside, tender inside. The cornstarch adds a lightness the plain flour alone can’t match, and it’s the real reason this dish tastes like the restaurant version.
- Fry in Batches—Don’t Rush: Crowding the pan drops the oil temperature fast, and that’s how you get uneven cooking. Fry 3-4 pieces at a time, and resist the urge to add more until the oil is back to a steady sizzle. I know, I know—it takes longer, but rushing this step means some pieces will be greasy and others undercooked.
- Rest Before Serving: This isn’t the prettiest method, but it’s the tastiest. Let the fried chicken sit on a wire rack for 5 minutes after frying—it keeps the crust from turning soggy when you add gravy or dipping sauce. I skip this when I’m lazy, but the dish is noticeably better when I don’t.
Storing and reheating this recipe
Refrigerator Storage
Store your fried chicken in an airtight container with parchment paper between layers to prevent sticking. Keep it refrigerated for up to 2 days, but I find the crust stays crispier if you eat it within 24 hours.
The gravy should be stored separately in a sealed container—it thickens as it cools, so add a splash of warm water or milk when reheating. 💫
Freezer Prep
For longer storage, freeze the chicken pieces on a tray first to prevent clumping, then transfer to a freezer bag with all the air squeezed out. Label with the date and freeze for up to 3 months.
The gravy freezes beautifully too—just thaw it in the fridge overnight before reheating. I like to portion the gravy into ice cube trays for easy single-use servings later.
Reheating Crispy Coating
To revive that signature crunch, reheat the chicken in a 350°F oven for 10-15 minutes on a wire rack. This allows hot air to circulate and crisp the coating without steaming it.
For extra crunch, sprinkle with 1 tsp cornstarch before reheating. Microwave reheating works too, but it'll lose some crispiness—cover with a damp paper towel and heat in 30-second intervals until warmed through.
Gravy Revival
Thawed gravy will thicken significantly, so whisk in 1-2 tablespoons warm milk or water to restore its creamy consistency. Reheat over medium-low heat while stirring constantly to prevent scorching. If it gets too thick, add more liquid gradually.
For best results, I like to reheat gravy in the same skillet used for frying—those fond bits add incredible depth of flavor. 🍲
Serving Leftovers
Leftover fried chicken makes an amazing sandwich—pile it high on toasted Texas toast with extra gravy and a side of pickles. For a hearty meal, serve with homemade mashed potatoes or fluffy biscuits.
I always keep a small bowl of gravy on the table so everyone can drizzle it generously over their plate. The key is to serve immediately after reheating while the coating is still crisp.
Pro Tips
If you're short on time, you can refrigerate the triple-dredged chicken pieces (uncooked) for up to 8 hours1-cup servings and freeze flat in a container.
When reheating, always stir vigorously to prevent lumps. And remember: the best fried chicken is always served with gravy—it's what makes this dish truly special. 🥛
Nutrition facts
Frequently asked questions
Why does this recipe use chicken thighs instead of breasts?
Chicken thighs stay juicier during the long frying process—dark meat has more natural fat that keeps it moist while developing that signature crispy crust. Breasts can dry out when fried for 6-8 minutes per side, but thighs handle the heat like pros. For best results, use bone-in, skin-on thighs if possible, though boneless works too.
Can I make this recipe ahead of time?
The buttermilk marinade works best overnight, and you can prep the triple-dredged chicken up to 8 hours ahead (store uncooked in the fridge). For leftovers, reheat fried chicken in the oven at 350°F for 10-15 minutes on a wire rack to restore crispiness. Gravy should be reheated separately and thinned with warm milk if needed.
What's the secret to that ultra-crispy coating?
The triple-dredge method (flour → buttermilk → flour → buttermilk → flour) creates layers of crunch. The 1 tbsp cornstarch in the flour mix is non-negotiable—it gives that shatteringly crisp texture. Let the coated chicken rest 15 minutes before frying so the coating sets properly. Frying at 350°F (not higher!) ensures even browning without steaming the coating.
How do I fix soggy fried chicken?
Soggy coating usually means one of two things: frying at too low a temperature or draining on paper towels instead of a wire rack. For crispy results, always fry at 350°F and drain on a rack. If your chicken is already soggy, sprinkle it with 1 tsp cornstarch and broil for 2-3 minutes to revive the crunch. Serve immediately after reheating!
Can I use chicken broth instead of buttermilk?
Not for the marinade—chicken broth lacks the acidity and fat needed to tenderize the meat properly. If you're out of buttermilk, substitute with whole milk + 1 tbsp vinegar or lemon juice, but let it sit 10 minutes to curdle. For the gravy, you can use chicken broth, but the buttermilk marinade is essential for that signature tender texture. Every bite should be juicy and flavorful!