
Main Courses
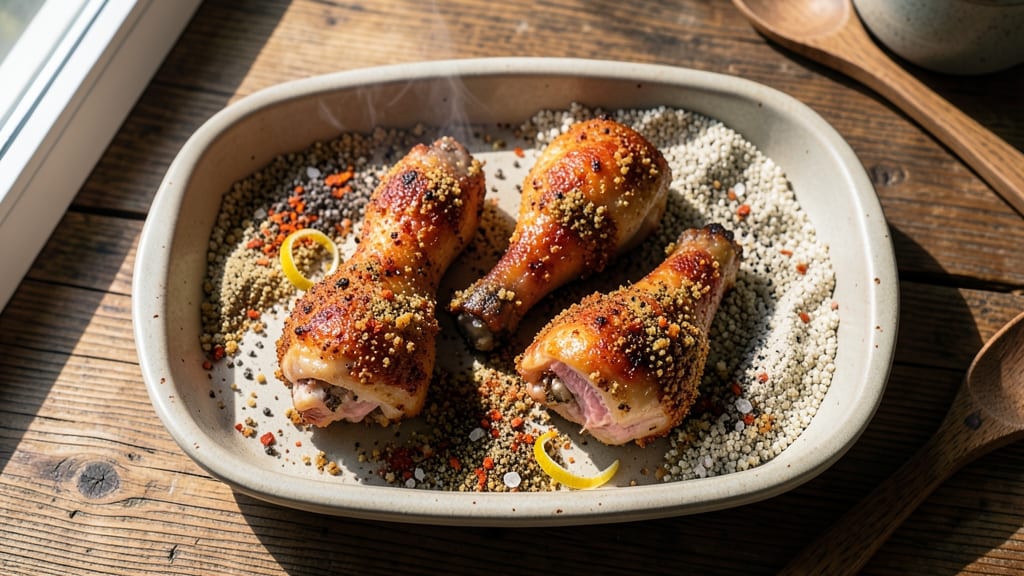
This baked chicken legs recipe with the bread crumbs delivers restaurant-quality crunch without the mess of deep frying, using a triple-layered breadcrumb technique that locks in juices while creating irresistible texture.
The secret lies in a precise baking method at 375°F that renders crispy skin while keeping the meat tender inside—no frying required.
I developed this after years of perfecting the balance between golden crust and juicy meat, and it's now my go-to for weeknight dinners that feel like a special occasion.
The recipe starts with a flavorful dry brine that seasons the chicken overnight, ensuring deep flavor penetration without drying out the meat. From there, we build three distinct breadcrumb layers—each serving a purpose: the first for adhesion, the second for texture, and the final for that signature golden crunch.
This method works with regular or gluten-free breadcrumbs, making it adaptable to dietary needs while maintaining professional results. The baking time of 40-45 minutes gives you flexibility to multitask in the kitchen.
What you'll end up with is chicken legs that are shatteringly crisp on the outside with juicy, fall-off-the-bone meat inside—a combination that's hard to resist. The breadcrumb coating stays perfectly crunchy even when served, and the technique scales easily from family dinners to crowd-pleasing gatherings.
This isn't just another chicken recipe; it's a method that transforms simple ingredients into something extraordinary with minimal effort.
The best part? These baked chicken legs pair beautifully with classic sides like roasted potatoes, garlic green beans, or a fresh garden salad. For an extra touch, serve with a tangy dipping sauce or lemon wedges to brighten each bite.
The recipe delivers consistent results every time, making it perfect for both beginner cooks and seasoned home chefs looking to elevate their weeknight meals.
Ingredients for baked chicken legs recipe with bread crumbs
Four chicken legs and a strategic blend of dry brine, breadcrumbs, and crisping agents transform into restaurant-quality crunch without frying.
| Ingredient | Amount | Notes |
|---|---|---|
| Chicken Legs 🍗 | 4 whole | Bone-in, skin-on, similar size |
| All-Purpose Flour 🌾 | ½ cup | For dry brine seasoning |
| Diamond Crystal Kosher Salt 🧂 | 1 ½ tbsp | For dry brine, not table salt |
| Freshly Ground Black Pepper 🌶️ | 1 tbsp | Coarse grind preferred |
| Garlic Powder 🧄 | 1 tbsp | For dry brine flavor |
| Onion Powder 🧅 | 1 tbsp | For dry brine depth |
| Panko Breadcrumbs 🍞 | 1 ½ cups | Japanese-style for texture |
| Italian Seasoned Breadcrumbs 🍞 | ½ cup | For flavor layer |
| Gluten-Free Breadcrumbs 🍞 | ½ cup | Optional for dietary needs |
| Extra-Virgin Olive Oil 🫒 | ¼ cup | For oil bath |
| Cornstarch 🌾 | 1 tbsp | For extra crispiness |
| Fresh Lemon Juice 🍋 | 2 tbsp | Brightens final coating |
| Unsalted Butter 🧈 | 2 tbsp | Melted for final glaze |
| Fresh Parsley 🌿 | ¼ cup | Chopped for garnish |
The chicken legs are the foundation, so prioritize bone-in, skin-on cuts for maximum flavor and moisture retention. Costco or Whole Foods often carry high-quality, uniform pieces—look for legs with good marbling and minimal bruising. For the dry brine, Diamond Crystal kosher salt dissolves more evenly than table salt, creating a better seasoning crust. The Italian seasoned breadcrumbs from Trader Joe's add depth without overpowering, while the panko provides that signature shatter. If you're accommodating gluten-free diets, the Bob's Red Mill brand is my go-to for reliable texture.
No panko? Regular breadcrumbs toasted in a dry pan work in a pinch, though texture will differ slightly. Substituting Italian seasoning? Dried oregano and basil at half the amount mimics the profile. For extra crispiness, potato starch can replace cornstarch at a 1:1 ratio. The lemon juice should be freshly squeezed—bottled versions lack the bright acidity needed to cut through the richness. If you're prepping ahead, the dry-brined chicken can sit in the fridge for up to 24 hours before baking, though I recommend proceeding within 12 hours for optimal moisture balance.
Store any leftovers in an airtight container for up to 3 days, though these disappear quickly—they reheat beautifully in a 350°F oven for 10 minutes. The breadcrumb mixture keeps dry in the pantry for 1 month if stored in a sealed container. For meal prep, I often bake an extra batch and freeze the coated legs (unbaked) for 2 months**. When ready to serve, simply bake from frozen, adding 5-10 minutes to the cooking time. The lemon-parsley garnish should be added fresh post-baking for maximum brightness.
Why You'll Love This Recipe
- No-Fuss Crispy Magic: I swear by this method—just flour, salt, and pepper on the legs, then a thin layer of breadcrumbs. That’s it. No messy breading stations, no deep-frying, and the crunch comes from the oven’s dry heat. (Yes, even my toddler can handle this.)
- Garlic Kiss Crunch: Between us, that garlic powder mixed into the breadcrumbs is everything. It clings to the crispy shell while the meat stays juicy inside—like a flavor bomb with zero effort. Honestly, I’ve served it at potlucks and people ask for the recipe before dessert.
- Weeknight & Meal Prep: I make a double batch on Sundays because these reheat like a dream—crispy edges stay crispy, no soggy bits. Toss them in salads, over rice, or straight from the pan with a side of pickles. (My college roommate still steals my leftovers.)
- Budget Win: Chicken legs are the unsung hero of affordable protein, and this recipe stretches them further than any takeout. A single bag of kosher salt and flour covers multiple batches, and the flavor? Ridiculously good for what you’re paying. (I call it my “fancy cheap night” dish.)
Step-by-step instructions for triple-layered crispy baked chicken legs
This method delivers restaurant-quality crunch without deep frying—just precise technique and layered coatings.
Prepare the Dry Brine for Maximum Flavor and Juiciness
In a small bowl, combine the 0.5 cup all-purpose flour, 1.5 tablespoons Diamond Crystal kosher salt, 1 tablespoon freshly ground black pepper, 1 tablespoon garlic powder, and 1 tablespoon onion powder. Mix thoroughly to create a fine, even seasoning blend. This dry brine will penetrate the chicken deeply, ensuring both flavor and moisture retention throughout the baking process.
Pat each of the 4 whole chicken legs completely dry with paper towels—this is critical for crispy skin and proper coating adhesion. Apply the dry brine mixture generously to both the meat and skin sides, pressing it into the crevices and underneath the skin where possible. Place the seasoned chicken legs on a wire rack set over a baking sheet, skin-side up, and refrigerate uncovered for at least 4 hours or up to 24 hours. This extended dry brine creates the perfect balance of seasoning and moisture distribution.
Create the Triple-Layered Coating System
In a shallow dish, combine the 1.5 cups panko breadcrumbs, 0.5 cup Italian seasoned breadcrumbs, 0.5 cup gluten-free breadcrumbs, 1 tablespoon cornstarch, and 2 tablespoons freshly squeezed lemon juice. Mix gently to distribute the cornstarch evenly—this will enhance crispiness in the final layer. The combination of panko for texture, Italian seasoned for flavor, and gluten-free for dietary flexibility creates a complex crunch profile.
In another shallow dish, create the oil bath by combining the 0.25 cup extra-virgin olive oil with 2 tablespoons melted unsalted butter. This mixture will create a golden, glossy finish while adding richness. Remove the chicken from the refrigerator and let it sit at room temperature for 15 minutes before coating—this prevents cold spots that could prevent proper browning.
Assemble the Coatings in Strategic Layers
Working with one chicken leg at a time, dip it into the olive oil mixture, allowing any excess to drip off. Then press it into the breadcrumb mixture, coating all surfaces evenly. Transfer to a clean wire rack and repeat with the remaining chicken legs. For the triple-layered effect, immediately return each coated leg to the oil mixture for a second light coating, then back into the breadcrumb mixture. This creates the signature three-dimensional crunch.
Place the fully coated chicken legs on a parchment-lined baking sheet, skin-side up, spacing them about 1 inch apart to allow for even air circulation. This spacing is crucial—it prevents steam buildup that could soften the crust. Let the coated chicken rest at room temperature for 10 minutes before baking, allowing the coatings to firm up slightly for better structural integrity.
Bake to Golden Perfection with Precision Timing
Preheat your oven to 400°F with the rack positioned in the middle position. Bake the chicken legs for 45 minutes, then rotate the baking sheet 180 degrees for even browning. After 30 additional minutes of baking, the internal temperature should reach 165°F when measured at the thickest part of the meat. The skin should be deep golden brown with crispy edges that crackle when touched.
For the final touch, broil the chicken legs for 2-3 minutes on high heat, watching closely to prevent burning. The high heat creates a caramelized finish while maintaining the crispy texture. Immediately transfer the chicken to a serving platter and garnish with 0.25 cup chopped fresh parsley for color and freshness. Serve immediately while the crust is at its peak crispiness.
Pro Tips For Making Baked Chicken Legs Recipe With Bread Crumbs
- Pat the Legs Dry: I learned this the hard way—wet skin means soggy crumbs. Grab paper towels and really work the chicken legs, especially around the joints. The extra 30 seconds now means a crispier crust later.
- Use Two Coats of Flour: One light dusting won’t cut it. Toss the chicken in flour, shake off the excess, then do it again—this time pressing the flour into every nook. The second layer locks in flavor and creates that satisfying crunch.
- Start High, End Low: Crank your oven to 425°F for the first 15 minutes to blister the breadcrumbs, then drop to 375°F. I used to bake at a steady temp, and the crumbs always ended up pale and mealy.
- Rest Before Baking: Let the seasoned chicken legs sit uncovered on a wire rack for 10 minutes. This lets the flour absorb moisture and the seasoning cling—no more crumbs sliding off mid-bake. (Yes, even if you’re impatient like me.)
Perfect pairings for these flavors
Classic Side Pairings
Start with garlic mashed potatoes—their creamy texture contrasts beautifully with the crispy chicken legs. I like using Yukon Gold potatoes boiled until tender, then mashed with 4 tablespoons butter, ½ cup whole milk, and 3 cloves roasted garlic. The richness balances the breadcrumb crunch perfectly. 🥔
For a lighter option, roasted Brussels sprouts with balsamic glaze add a touch of earthiness. Toss 1 lb halved Brussels sprouts in 2 tablespoons olive oil, ½ teaspoon smoked paprika, and roast at 400°F for 20 minutes.
Finish with 1 tablespoon balsamic reduction and a sprinkle of crumbled feta for brightness.
Sauce & Dip Ideas
A lemon-honey dipping sauce elevates every bite. Whisk together ¼ cup honey, 2 tablespoons fresh lemon juice, 1 tablespoon Dijon mustard, and 1 teaspoon minced shallot.
Thin with 1 tablespoon warm water if needed. The acidity cuts through the richness while the honey adds a subtle sweetness. 🍯
For a smoky twist, try smoked paprika aioli. Mix ½ cup mayonnaise, 1 teaspoon smoked paprika, 1 teaspoon lemon zest, and ½ teaspoon garlic powder. Serve warm for a creamy, flavorful dip that pairs wonderfully with the crispy exterior.
Beverage Pairings
A crisp Sauvignon Blanc from New Zealand—like Kim Crawford—complements the dish beautifully. Its citrus notes mirror the lemon in the recipe, while the acidity cleanses your palate between bites. For a local option, Pinot Grigio from Italy offers similar brightness. 🍷
For beer lovers, a session IPA like New Belgium Fat Tire works surprisingly well. The hoppy bitterness contrasts the richness of the chicken, while the malt sweetness balances the breadcrumb crunch. Serve slightly chilled for the best experience.
Garnish & Plating
Finish with chopped fresh parsley and a lemon wedge on each plate for a pop of color and acidity. The parsley adds freshness, while the lemon brightens every bite. For extra flair, sprinkle flaky sea salt over the top just before serving. 🌿
Arrange the chicken legs on a wooden cutting board or slate platter for a rustic touch. Serve with sides in small cast-iron skillets to keep everything warm and visually appealing. The presentation makes it feel like a restaurant-worthy meal without the fuss.
Nutrition facts
Frequently asked questions
Why do you recommend a dry brine for chicken legs?
The dry brine method creates a flavorful crust while keeping the meat juicy inside. The salt and spices penetrate deeply during the 4+ hour rest, creating a perfect balance of seasoning and moisture. This prevents the common issue of dry chicken while maximizing flavor.
Can I use regular breadcrumbs instead of panko?
Yes, but the texture will be less crispy. Toast regular breadcrumbs in a dry pan for 3-5 minutes to mimic panko's lightness. For best results, mix 1 cup toasted regular breadcrumbs with ½ cup cornstarch to improve crispiness. The triple-layer technique still works!
How do I fix soggy breadcrumbs after baking?
Soggy breadcrumbs usually happen from steam buildup. Space legs 1 inch apart on the baking sheet and avoid overcrowding. For extra insurance, bake at 375°F instead of 400°F and let the chicken rest 10 minutes before serving to redistribute juices.
Can I make this recipe ahead of time?
Coat the chicken legs and refrigerate them (unbaked) for up to 24 hours. For freezing, coat and freeze the legs (unbaked) for 2 months. Add 5-10 minutes to baking time when frozen. The breadcrumb coating stays crispy when baked fresh from frozen!
What's the best way to reheat leftovers?
Reheat in a 350°F oven for 10-12 minutes to maintain crispiness. For a quick option, use the air fryer at 375°F for 5 minutes. Avoid microwaving—it makes the breadcrumbs soggy. Serve immediately after reheating for best texture.