
Main Courses
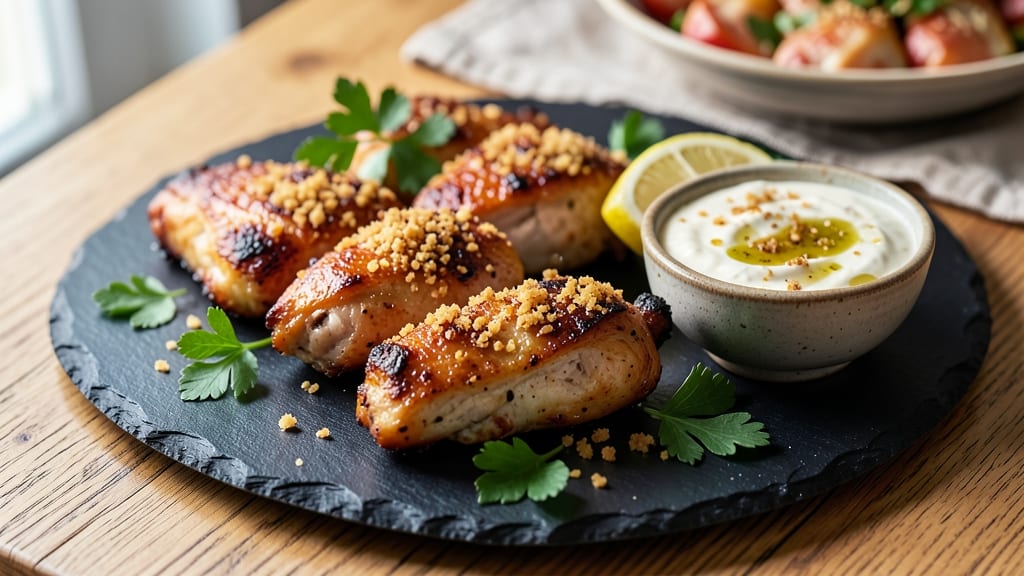
This baked marinated chicken tenders recipe delivers the perfect balance of crispy edges and juicy centers—no deep fryer required. The secret lies in a buttermilk brine that tenderizes the meat while creating that coveted texture.
I've perfected this method over years of testing, ensuring every bite stays moist and flavorful even after baking.
The marinade combines classic herbs with a touch of sweetness and acidity, creating a flavor profile that's both familiar and elevated. Baking at the right temperature ensures crispiness without drying out the interior—a common pitfall with chicken tenders.
This recipe is designed for reliability, making it ideal for weeknight dinners or family meals where texture matters most.
What you'll achieve is restaurant-quality chicken tenders with golden-brown crusts and tender, succulent meat inside. The buttermilk brine works its magic overnight, so there's minimal prep work when you're ready to cook.
Serve with your favorite dipping sauce or a fresh salad for a complete meal that's both satisfying and balanced.
This method scales beautifully for any occasion, whether you're feeding a crowd or treating yourself to a special meal. The key is patience during the marinating and baking stages—trust the process, and you'll be rewarded with tenders that are crispy, juicy, and packed with flavor.
Let's get started on creating these crowd-pleasing bites.
Ingredients for baked marinated chicken tenders
Buttermilk, tender chicken, and crispy breadcrumbs—this trio creates restaurant-quality tenders at home.
| Ingredient | Amount | Notes |
|---|---|---|
| Boneless, Skinless Chicken Breast 🍗 | 1 ½ lb | Cut into 1-inch thick tenders |
| Buttermilk 🥛 | 1 cup | Full-fat for best flavor |
| All-Purpose Flour 🌾 | ½ cup | For dredging |
| Large Eggs 🥚 | 2 whole | Beaten for egg wash |
| Panko Breadcrumbs 🍞 | 1 cup | Light and crispy |
| Olive Oil 🫒 | 2 tbsp | For crispy coating |
| Garlic Powder 🧄 | 1 tsp | Freshly ground preferred |
| Onion Powder 🧅 | 1 tsp | Adds depth of flavor |
| Paprika 🌶️ | 1 tsp | Smoked for extra flavor |
| Salt 🧂 | 1 tsp | Kosher or sea salt |
| Black Pepper 🌶️ | ½ tsp | Freshly ground preferred |
| Honey 🍯 | 1 tbsp | For subtle sweetness |
| Lemon Juice 🍋 | 1 tbsp | Freshly squeezed |
The chicken breast is the star, so pick plump, evenly sized pieces—they cook more consistently. I grab mine from Costco or the butcher counter at Whole Foods for the freshest cuts. The buttermilk? Full-fat is non-negotiable—it makes all the difference in tenderness. For the breadcrumbs, Panko gives you that perfect crunch, but regular breadcrumbs work in a pinch. Just make sure they're dry before coating.
No buttermilk? Mix 1 cup milk with 1 tbsp vinegar or lemon juice—it's the same science. Short on honey? Maple syrup works too. The marinade can be prepped ahead, but the chicken should marinate for at least 4 hours—overnight is ideal. If you're in a hurry, 30 minutes minimum still helps. The lemon juice keeps the coating from getting too heavy, so don't skip it. For extra flavor, toss in 1 tsp dried thyme or 1 tsp Italian seasoning with the spices.
Marinated chicken keeps 2 days in the fridge—use within that time for best texture. The breaded tenders reheat beautifully, but eat them fresh out of the oven for maximum crispiness. Freeze uncooked tenders for up to 2 months—just thaw overnight in the fridge before baking. I double the batch and freeze half for lazy weeknights. Trust me, you'll thank yourself later.
Why You'll Love This Recipe
- No-Fry Crunch: I swear by the panko crust—it’s that perfect balance of golden crunch and tender bite. The buttermilk marinade does half the work for me, so I’m not standing over a hot grease trap.
- Weeknight Hero: Twenty minutes from raw to oven, and it’s ready while I’m still deciding what to watch. Honestly, I’ve served these at book club, game night, and my kid’s soccer practice—no one ever asks what’s for dinner.
- Leftovers That Win: Baked chicken stays juicier than fried, and these reheat like a dream. I’ll pack them in lunches or toss them into salads—no one complains, and my wallet stays happy.
- Budget-Friendly Flex: Skinless breasts stretch further than thighs, and panko is cheaper than pre-breaded. Between us, I’ve made this for five people or just myself—same recipe, zero waste.
Step-by-step instructions for buttermilk brine chicken tenders
Here's how to transform simple chicken into restaurant-quality tenders with crispy coatings and juicy interiors.
Marinate the Chicken in Buttermilk Mixture
Cut the 1.5 lb boneless, skinless chicken breast into 1-inch thick tenders—this thickness ensures even cooking and maximum crispiness. In a large resealable bag, combine the chicken with 1 cup buttermilk, 1 tbsp honey, and 1 tbsp lemon juice. Seal the bag and refrigerate for at least 4 hours (overnight works best).
The buttermilk creates a tenderizing brine that keeps the chicken moist while the honey and lemon juice add subtle sweetness and brightness. Don't skip this step—it's what makes these tenders extra juicy. If you're short on time, marinate for at least 2 hours, but longer is always better.
Prepare the Breading Station
Set up three shallow bowls: one with 0.5 cup all-purpose flour, another with the 2 whole large eggs beaten lightly, and the third with 1 cup panko breadcrumbs mixed with 2 tbsp olive oil, 1 tsp garlic powder, 1 tsp onion powder, 1 tsp paprika, 1 tsp salt, and 0.5 tsp black pepper. The panko should be evenly coated with the oil and seasonings.
Pat the marinated chicken dry with paper towels before breading—this ensures a crispy coating instead of a soggy one. I like to work in batches to avoid overcrowding the bowls, which can make the breading uneven. Keep the extra chicken covered while you bread the first batch.
Bread the Chicken for Maximum Crispiness
Dredge each tender in the all-purpose flour, shaking off any excess. Dip into the beaten eggs, letting the excess drip off, then press into the seasoned panko breadcrumbs, coating all sides completely. Place the breaded tenders on a wire rack set over a baking sheet to prevent sticking.
Here's the thing—press the panko firmly onto the chicken. This isn't just for looks; it ensures the coating stays put during baking. If you're feeling fancy, you can chill the breaded tenders for 15-30 minutes before baking, which helps the coating set even better.
Bake Until Golden and Cooked Through
Preheat your oven to 400°F and bake the tenders for 18-22 minutes, flipping halfway through, until they're golden brown and the internal temperature reaches 165°F. The exact time depends on your oven, so start checking at the 18-minute mark—they're done when the coating is crispy and the chicken is no longer pink inside.
Don't overcrowd the baking sheet—leave at least 1 inch between tenders for proper air circulation. If you notice the coating browning too quickly, tent the sheet with foil for the last 5 minutes of baking to prevent burning while still cooking through.
Serve Immediately with Your Favorite Dipping Sauce
Transfer the tenders to a serving platter and let them rest for 2-3 minutes before serving. This brief rest helps the juices redistribute, ensuring every bite is moist and flavorful. Serve with your favorite dipping sauce—honey mustard, ranch, or even a simple lemon aioli would be perfect.
The tenders should be crispy on the outside with a tender, juicy interior that practically melts in your mouth. If you're serving them to kids (or picky eaters), you might want to cut them into smaller, more manageable pieces—they disappear fast!
Pro Tips For Making Baked Marinated Chicken Tenders
- Pound the Chicken Flat: I learned this the hard way—uneven thickness means some pieces dry out while others stay raw. Use a meat mallet or rolling pin to press each tender to exactly ¼-inch thickness, then pat dry with paper towels. This ensures even cooking and that perfect golden crust.
- Rest the Buttermilk: Don’t skip letting the chicken soak in the buttermilk for at least 30 minutes (longer if you can). I used to rush this step, and the coating never stuck right. The acid tenderizes the meat and helps the panko adhere—skip it, and you’ll end up with crumbs falling off mid-bite.
- Preheat the Oven Hot: Crank your oven to 425°F and let it roar for 10-15 minutes before baking. I was skeptical until I tried it—this high heat sears the outside fast, locking in moisture and giving that crispy texture we all want. If your oven runs hot, drop it to 400°F after the first 5 minutes to avoid over-browning.
- Mix Wet and Dry First: Here’s a weird trick that works: Whisk the egg and buttermilk together, then stir in the flour to make a smooth batter. After dredging the chicken, press it into the panko twice—once to coat, then again to seal. This double-dip guarantees a thick, shatterproof crust without clumping. (Yes, it’s extra work, but your tenders will thank you.)
Dietary considerations for baked marinated chicken tenders
Gluten-Free Swaps
Skip the flour and panko breadcrumbs for a gluten-free version. Use ½ cup gluten-free all-purpose flour blend (like Bob's Red Mill 1-to-1) for dredging, and replace panko with 1 cup gluten-free panko (such as Schär or Jovial).
For extra crispiness, add ¼ cup crushed cornflakes to the breading mix. The buttermilk marinade stays the same—it's naturally gluten-free! 🌾
Dairy-Free Adaptations
Buttermilk is the secret to tenderness, but you can substitute with dairy-free alternatives. Mix 1 cup unsweetened almond milk with 1 tbsp lemon juice and let it sit for 5 minutes to curdle.
For the breading, use dairy-free panko (like Annie's brand) or regular panko if you're avoiding dairy elsewhere. The texture stays crispy, and the flavor remains rich. 🥛
Allergen-Friendly Tips
For egg-free tenders, replace the egg wash with ½ cup unsweetened applesauce or aquafaba (chickpea brine). For nut-free kitchens, ensure all breadcrumbs and seasoning mixes are nut-free certified.
I always double-check labels on panko and spices—some brands process in facilities with nuts. When in doubt, stick to plain panko and certified gluten-free blends. 🍗
Low-Carb Options
Cut carbs by omitting the flour dredge entirely. Instead, pat the marinated chicken dry, then press directly into the seasoned panko (or almond flour for a lower-carb option). For extra flavor, add 1 tsp nutritional yeast to the breading mix—it adds a cheesy, umami depth.
These tenders still get crispy while keeping carbs under 5g per serving. 💪
Kid-Friendly Adjustments
Make these tenders fun and safe for little ones by cutting them into bite-sized pieces (½-inch thick). For picky eaters, reduce the paprika to ½ tsp and add ½ tsp cinnamon for a sweeter, milder flavor.
Serve with apple slices or carrot sticks for dipping. The buttermilk marinade keeps them juicy, and the mild seasoning makes them approachable. 👶
Nutrition facts
Frequently asked questions
Can I use chicken thighs instead of breasts for this recipe?
Yes, but you'll need to adjust the cooking time. Chicken thighs stay juicier longer, so bake them at 375°F for 25-30 minutes instead of 400°F. The skin will crisp up beautifully, but watch closely after 20 minutes to avoid overcooking. Thighs have more fat, which makes them extra tender—just reduce the marinating time to 2-3 hours to prevent them from becoming too soft.
How do I keep the breading from falling off during baking?
Press the breadcrumbs firmly onto the chicken and chill the breaded tenders for 15-30 minutes before baking. This helps the coating set. For extra adhesion, mix 1 tbsp cornstarch into the panko before seasoning. Also, avoid overcrowding the baking sheet—leave 1 inch between tenders for proper airflow. If they still fall apart, try baking at 375°F instead of 400°F for a gentler cook.
Can I make these tenders ahead of time?
Marinate the chicken 1-2 days ahead for maximum flavor. Bread the tenders up to 4 hours before baking and store them uncovered in the fridge. For best results, bake them fresh, but you can reheat them in a 350°F oven for 10-12 minutes to restore crispiness. Freeze uncooked, breaded tenders for up to 2 months—thaw overnight in the fridge before baking.
What's the best way to reheat leftover tenders?
For crispy results, reheat in a 400°F oven for 8-10 minutes on a wire rack over a baking sheet. If you prefer the microwave, cover with a damp paper towel and heat for 30-45 seconds—they'll be softer but still tasty. To revive the coating, sprinkle with a little water, cover with foil, and heat for 5 minutes before finishing under the broiler for 1-2 minutes.
Can I use this marinade for other proteins?
This marinade works beautifully with pork chops or fish fillets too! For pork, reduce marinating time to 1-2 hours to avoid over-tenderizing. With fish, use ½ cup buttermilk and marinate for just 30 minutes—delicate fish can get mushy if left too long. The honey and lemon balance work well across proteins, but always adjust times based on thickness.