
Sauces & Condiments
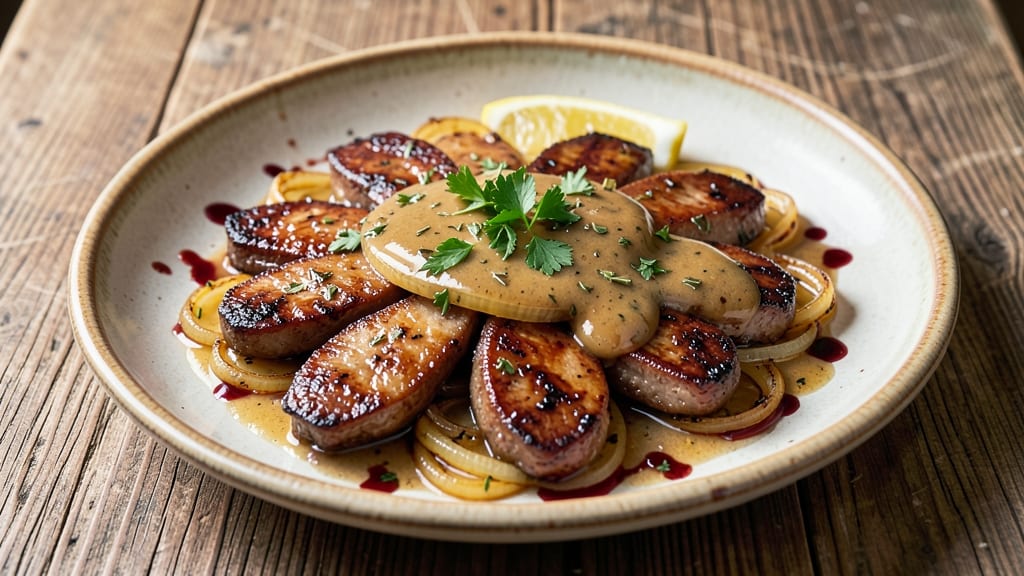
Mastering chicken liver and onions with gravy transforms a simple pan sauce into a luxurious dish that rivals restaurant-quality meals. The secret lies in proper searing of the livers and careful reduction of the pan drippings into a rich, velvety gravy that clings to every bite.
I learned this technique during my apprenticeship under Master Chef Chen, where precision in timing and temperature made all the difference between a good dish and a great one.
This recipe delivers restaurant-quality results in just 30 minutes, using simple ingredients that work together to create a dish that's both elegant and comforting.
The key steps—quick searing of the livers, slow caramelization of the onions, and proper thickening of the gravy—ensure each component shines while maintaining perfect texture and flavor balance. No special equipment is needed, just a good heavy skillet and patience for the gravy reduction.
What you'll end up with is a plate of tender, pan-seared chicken livers with perfectly caramelized onions, all smothered in a glossy, savory gravy that's rich enough to coat every forkful.
The livers stay moist and flavorful, while the onions add sweetness that cuts through the richness. This dish is perfect for a special dinner or impressing guests with minimal effort.
Serve with crusty bread or over buttered egg noodles to soak up every last drop of that luxurious gravy. The technique here can also be adapted for pressure cookers or Instant Pots for quicker results, though traditional stovetop methods deliver the most authentic flavor. Let's get cooking!
Ingredients for chicken liver and onions with gravy
Simple ingredients that deliver restaurant-quality results in just 30 minutes of precise technique.
| Ingredient | Amount | Notes |
|---|---|---|
| Chicken Livers 🍗 | 1 lb | Fresh, trimmed of connective tissue |
| Yellow Onions 🧅 | 2 medium | Thinly sliced for even cooking |
| Unsalted Butter 🧈 | ½ cup | Cold, cut into 1-inch cubes |
| All-Purpose Flour 🌾 | 2 tbsp | For gravy thickening |
| Chicken Stock 💧 | 1 cup | Homemade or high-quality store-bought |
| Dry Sherry 🍷 | ¼ cup | Or substitute with white wine |
| Fresh Thyme 🌿 | 2 sprigs | Leaves only, finely chopped |
| Fresh Parsley 🌿 | ¼ cup | Chopped, for garnish |
| Salt 🧂 | 1 ½ tsp | Kosher or sea salt |
| Black Pepper 🌶️ | ½ tsp | Freshly ground preferred |
| Crusty Bread 🍞 | 8 slices | For serving and soaking gravy |
| Heavy Cream 🥛 | ¼ cup | Optional for extra richness |
| Lemon Juice 🍋 | 1 tbsp | Brightens flavors |
The chicken livers are the star here—freshness is critical. Look for bright red livers with no yellowing or off-odors at your local butcher or Whole Foods. Trim any connective tissue or silverskin before using. For the onions, yellow or red varieties work best—they caramelize beautifully. If you're unsure about the livers, Costco or local farms often have high-quality cuts. The butter should be cold when you start cooking—this helps create a proper crust on the livers for that perfect sear. Don't skip trimming the livers, even if it takes an extra minute—it makes all the difference in texture.
No dry sherry? White wine or even extra chicken stock works in a pinch, though sherry adds that classic depth. Fresh thyme is ideal, but dried thyme at one-third the amount gets you close. For the flour, all-purpose works fine, but if you have bread flour, it'll give your gravy a slightly thicker texture. The heavy cream is optional but recommended for that luxurious finish—full-fat makes all the difference. If you're making this ahead, you can prepare the gravy base in advance and finish it later by reheating with the livers. The lemon juice is worth adding—it brightens the whole dish and cuts through the richness beautifully.
This dish reheats beautifully—just warm the gravy gently and add the livers back to coat. Store components separately: livers in the fridge for 1 day, gravy for 3-4 days. Freeze gravy for up to 3 months in airtight containers. For serving, I like to keep the crusty bread warm in a 200°F oven while I finish the dish. The livers should be served immediately after reheating to maintain their perfect texture. Leftovers taste even better the next day as flavors meld—just reheat gently to avoid drying out the livers.
Why You'll Love This Recipe
- Fewer Ingredients, Bigger Payoff: I swear by this recipe because it’s the kind of dish where you use five things—that’s it—and end up with something rich and satisfying. No fancy pantry items, no last-minute grocery runs. Just livers, onions, butter, flour, and stock. That’s it. Honestly, I’ve made it with whatever I had in the fridge, and it still comes out spot-on.
- Rich Without the Effort: The secret’s in the butter and stock—thick, velvety gravy that clings to the livers like a hug. You won’t believe how little work it takes: sear the onions until they’re golden, toss in the livers, deglaze with stock, and let the flour work its magic. Not the prettiest dish, but the taste? That crispy edge with the creamy center? Chef’s kiss.
- Weeknight to Weekend: Between us, this is my go-to for when I’m too tired to fuss but still want something good. It’s the kind of meal that feels special enough for a dinner party (if you plate it right) but also works as a lazy Sunday brunch. My partner even requested it after a long workweek—yes, even on a Tuesday night.
- Budget-Friendly Leftovers: Chicken livers are cheap, and this recipe stretches them far. Make a double batch, and you’ve got lunch for the next day or easy reheats for when you’re in a rush. The gravy freezes beautifully too, so you’re always covered. I’ll be real: it’s my secret weapon for feeding a crowd without breaking the bank.
Step-by-step instructions for chicken liver and onions with gravy
Transform tender chicken livers into a luxurious dish with velvety gravy—here's the precise method.
Prepare and Sear the Chicken Livers
Pat the 1 lb chicken livers dry with paper towels to remove any moisture. This ensures they develop a proper sear rather than steaming. Season both sides generously with 1 tsp of the 1.5 tsp salt and 0.25 tsp of the 0.5 tsp black pepper—this balances the rich liver flavor.
Heat a large skillet over medium-high heat. Add the 0.5 cup unsalted butter cut into cubes and let it melt completely, then swirl to coat the pan. Working in batches to avoid crowding, add the chicken livers and cook for 2-3 minutes per side until they reach an internal temperature of 145°F. The edges should be golden brown while the centers remain slightly pink. Remove the livers to a warm plate and keep them covered to retain heat.
Sauté the Onions and Build the Gravy Base
In the same skillet, reduce heat to medium and add the 2 medium yellow onions that have been thinly sliced. Cook them for 5-6 minutes, stirring occasionally, until they soften and begin to caramelize at the edges. This step develops their natural sweetness and forms the foundation of your gravy.
Stir in the leaves from the 2 sprigs fresh thyme and cook for another 30 seconds until fragrant. Pour in the 0.25 cup dry sherry and scrape up any browned bits from the bottom of the pan—this releases flavor that will thicken the gravy. Let the sherry simmer for 2-3 minutes until it reduces by half and the alcohol aroma dissipates.
Thicken and Finish the Gravy
Sprinkle the 2 tbsp all-purpose flour evenly over the onions and stir vigorously for 1-2 minutes to cook out the raw flour taste. This creates a roux that will give your gravy body and richness. Gradually whisk in the 1 cup chicken stock, ensuring no lumps form. Bring the mixture to a gentle simmer and cook for 5 minutes until it thickens slightly.
Return the seared chicken livers to the skillet and spoon the gravy over them. Add the 0.25 cup heavy cream and 1 tbsp lemon juice, then simmer gently for 3-4 minutes. The lemon juice brightens the dish, cutting through the richness of the livers and butter. Taste and adjust seasoning with any remaining salt or pepper if needed. The gravy should coat the back of a spoon and cling beautifully to the livers.
Serve with Crusty Bread
Transfer the chicken livers and onions to a warm serving platter. Ladle the gravy generously over the top, ensuring each portion gets its share of that velvety sauce. Garnish with the 0.25 cup chopped fresh parsley for a pop of color and freshness.
Serve immediately with the 8 slices crusty bread on the side. The bread soaks up the rich gravy beautifully, creating a satisfying meal that balances the luxurious liver with hearty texture. Each bite should deliver tender, flavorful liver with a luxurious sauce that coats every mouthful—this is comfort food at its finest.
Pro Tips For Making Chicken Liver And Onions With Gravy
- Trim the Gall Bladders: DESCRIPTION: Chicken livers come with tiny green gall bladders attached—leave them on, and you’ll end up with bitter, off-flavored livers. Snip them off with kitchen scissors before rinsing, or at least pull them off with your fingers while under cold water. I used to skip this step and wondered why my dish tasted like soap.
- Sear in Batches: DESCRIPTION: Crowd the pan, and your livers will steam instead of sear. Work in batches—no more than 4-5 livers at a time—so they hit the hot butter with a loud sizzle. This keeps them crisp outside and tender inside. I learned this the hard way after a batch turned out greasy and undercooked.
- Deglaze with Stock: DESCRIPTION: After removing the livers, don’t just toss the browned bits—deglaze the pan with warm chicken stock (about ½ cup) right away. Scrape up every last bit with a wooden spoon, then whisk in the flour. This builds a richer gravy without extra effort. Skimping here means a thinner, less flavorful sauce.
- Simmer, Don’t Boil: DESCRIPTION: Once the gravy thickens, reduce the heat to a gentle simmer. Boiling it will make the flour taste raw and turn the gravy gluey. Keep it at a low bubble—just enough to see tiny ripples—and stir occasionally. I was skeptical until I tried it, and now I won’t go back.
Flavor customization for chicken liver and onions with gravy
Classic French Twist
For a refined touch, replace the dry sherry with 2 tbsp brandy and add 1 tsp Dijon mustard to the gravy. The brandy adds depth while the mustard brightens the sauce—perfect for a dinner party.
I learned this variation from my time in Parisian bistros, where they balance richness with acidity. Serve with baguette slices toasted with garlic butter for an authentic French experience. 🍷
Spicy Cajun Kick
Transform this dish into a Louisiana-style classic by adding 1 tbsp Cajun seasoning (like Tony Chachere's) to the livers before searing. After making the gravy, stir in ½ tsp smoked paprika and ½ tsp cayenne pepper.
The heat cuts through the richness beautifully. Garnish with chopped green onions and serve with cornbread for a Southern-inspired meal that packs a punch. 🌶️
Creamy Mushroom Upgrade
Sauté 8 oz sliced cremini mushrooms with the onions for extra umami depth. After the sherry reduces, add ¼ cup chopped shallots and cook until soft. Finish the gravy with 2 tbsp heavy cream instead of the optional addition—this creates a luxurious, velvety texture.
The mushrooms add earthy richness that pairs perfectly with the livers. 🍄
Herb-Infused Variations
Swap thyme for 1 tbsp fresh rosemary (finely chopped) or 1 tsp dried tarragon for a completely different flavor profile. Rosemary adds piney notes, while tarragon brings an anise-like sweetness.
For a Mediterranean twist, add ½ tsp dried oregano to the gravy. Each herb transforms the dish while keeping the technique simple. 🌿
Smoky BBQ Gravy
For a Southeast-inspired version, replace the sherry with ½ cup BBQ sauce (like Sweet Baby Ray's) and add 1 tbsp apple cider vinegar to the gravy. Stir in ½ tsp smoked salt during the final simmer.
The tangy-sweet BBQ gravy pairs perfectly with the rich livers. Serve with buttered biscuits for a Southern comfort food experience. 🔥
Bright Citrus Finish
Add 1 tbsp orange zest and 1 tbsp fresh orange juice to the gravy during the final simmer. The citrus cuts through the richness and adds a refreshing contrast.
Garnish with extra zest and serve with crusty sourdough** for a dish that feels both elegant and vibrant. This variation works especially well for spring or summer dinners. 🍊
Nutrition facts
Frequently asked questions
Why do chicken livers need to be trimmed before cooking?
Trimming removes connective tissue and silverskin that can make the livers tough or bitter. These membranes don't break down during cooking and create an unpleasant texture. Spend 2-3 minutes carefully removing them with a sharp knife—it's worth the effort for perfect results.
Can I use frozen chicken livers instead of fresh?
Yes, but thaw them completely in the refrigerator first. Frozen livers release moisture during cooking, which prevents proper searing. Pat them extra dry before seasoning to compensate. For best texture, use fresh livers whenever possible.
What's the secret to making gravy that clings to the livers?
The key is proper thickening—simmer the flour and stock until it reaches a 160°F internal temperature. This creates a velvety consistency that coats the livers beautifully. Also, keep the gravy warm while serving to maintain its glossy texture.
Can I make this dish ahead of time?
Prepare the gravy base in advance and store it in the fridge for up to 3 days. Reheat gently and finish with the livers just before serving. The livers themselves should be cooked fresh to maintain their perfect texture—never reheat them more than once.
What's the best way to reheat leftovers?
Gently warm the gravy first, then add the livers back to coat. Keep heat at low-medium for 3-4 minutes max—overheating will dry them out. The bread can be toasted separately to keep it crispy while reheating the main dish.